ORANGE EASEL
  • Summer 2019
  • Orange Easel e-Classes
  • Kids Classes
  • Birthdays
  • Beyond Classes
  • For Current Students
  • Orange Easel Blog
  • Contact Us or Find Us
  • Calendar
  • Special Events
  • FAQs
  • About Us
  • Summer 2019
  • Orange Easel e-Classes
  • Kids Classes
  • Birthdays
  • Beyond Classes
  • For Current Students
  • Orange Easel Blog
  • Contact Us or Find Us
  • Calendar
  • Special Events
  • FAQs
  • About Us
Search
WELCOME TO THE STUDIO

O R A N G E    E A S E L    B L O G

Valentines Art Activity - Printing on Gelli Plates

1/8/2019

 
Gel Print Kids Art Activity perfect for homemade diy valentines -- uses gelli plates -- finished with gold detailing
This post contains affiliate links.
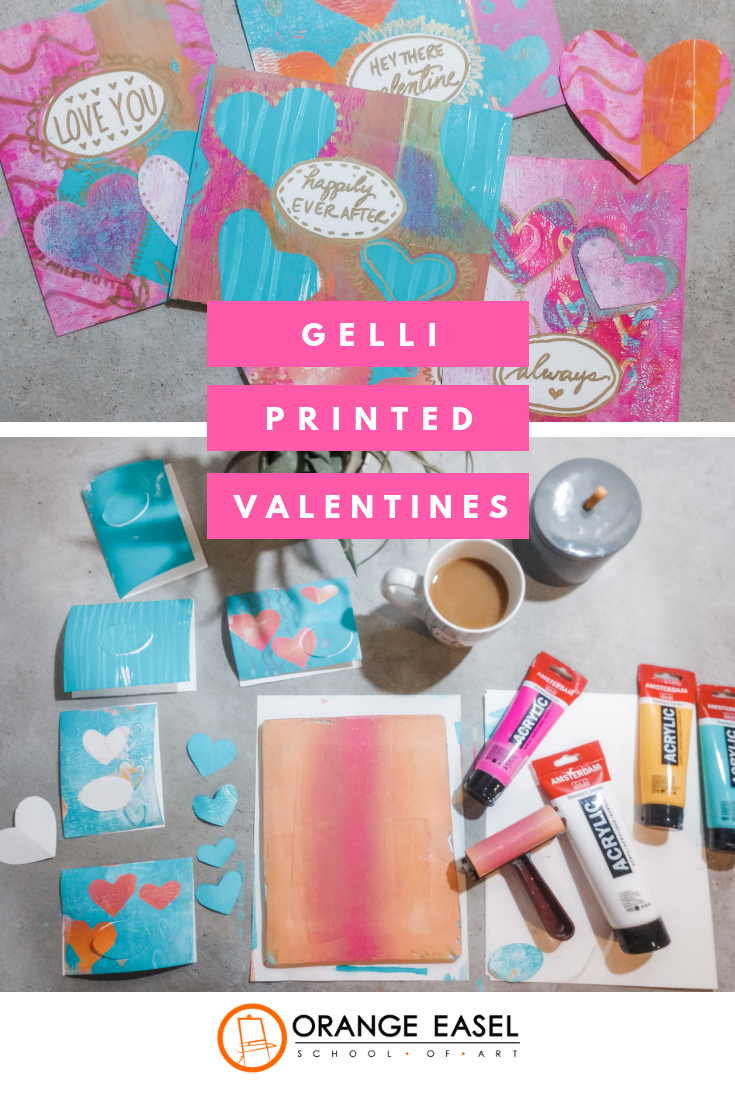
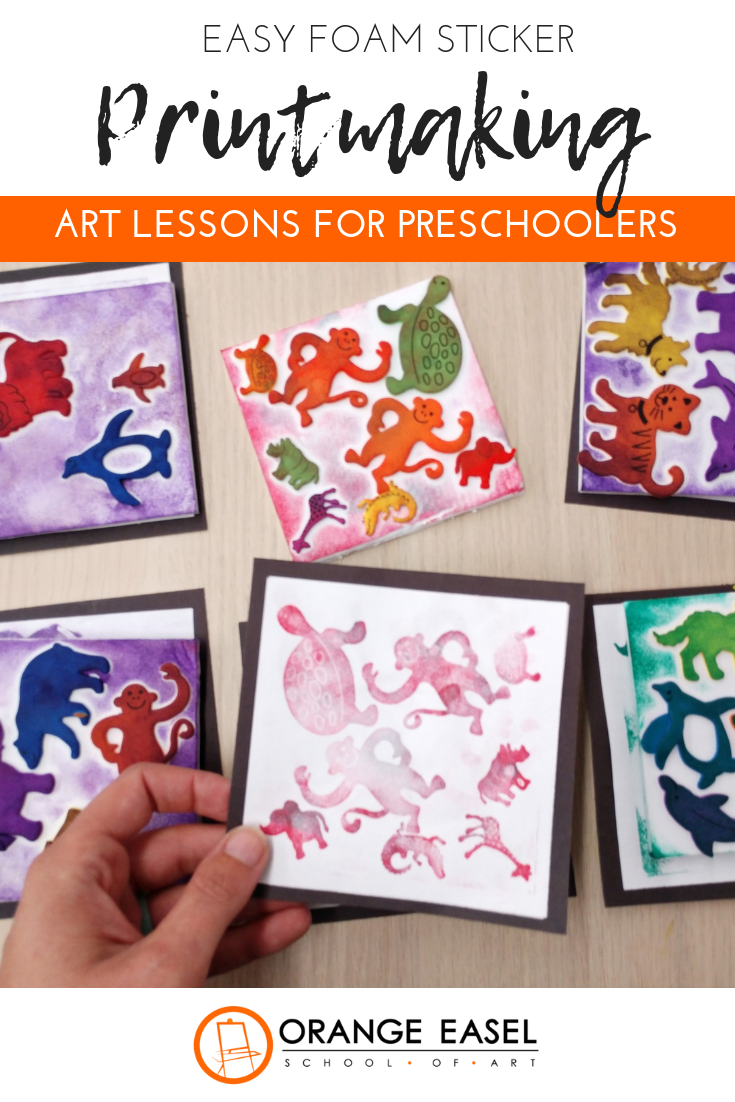
I adore these homemade, paint-printed valentines with metallic gold details.  They are made using gel printing plates from Gelli Arts and the result is a layered, textured, one-of-a-kind Valentine.  I hope you enjoy the tutorial below!
Picture

Printmaking Valentine Tutorial

Gel Print Kids Art Activity perfect for homemade diy valentines -- uses gelli plates -- finished with gold detailing
SUPPLIES:
Blank notecards
Gelli plate
Acrylic paint
Brayer
Paper plate or scrap paper (palette)
Baby wipes (to clean gelli plates)
Drawing paper
Scissors
Q-tips
Gold sharpie
Gel Print Kids Art Activity perfect for homemade diy valentines -- uses gelli plates -- finished with gold detailing
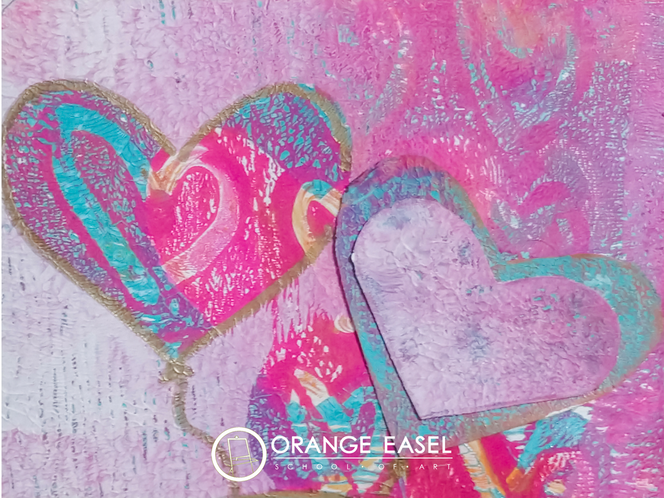
We started by picking a color scheme.  We opted for coral, magenta, turquoise, and white knowing that the gold sharpie would be the perfect finishing touch.   Gelli plates work best by layering pattern and colors, using masks each time you print so that the bottom layers peak through.  
Gel Print Kids Art Activity perfect for homemade diy valentines -- uses gelli plates -- finished with gold detailing
To make the masks, we cut hearts from the white drawing paper, making sure to keep both the positive hearts AND the negative mask.  Both will be useful!
Gel Print Kids Art Activity perfect for homemade diy valentines -- uses gelli plates -- finished with gold detailing
Since each layer has to dry a bit in between, we started by printing the bottom layer on all six cards.  (You can work on one card at a time if you'd rather.)  Each card was prepped with a center circle mask taped in place. Some backgrounds were gradients.  Some were patterns.  Some where solids.
Gel Print Kids Art Activity perfect for homemade diy valentines -- uses gelli plates -- finished with gold detailing
Leaving the white circle in place on every card, we continued to the second layer.  This is really something that ONLY makes sense if you play around with it!  By placing a heart on a painted gelli plate, you allow the bottom layer to peak through on the card (in the shape of a heart).  Conversely, but placing the negative mask on a painted gelli plate, you print the positive heart onto your card.  Whew.  Brainteaser.
Gel Print Kids Art Activity perfect for homemade diy valentines -- uses gelli plates -- finished with gold detailing
You can do as many layers you want.  Just keep adding patterns and masks to create depth to your prints.  Use the q-tip to doodle a pattern into the paint before you print.  Wipe your gelli plates off in between paint colors, especially if they are complimentary, so you don't end up with brown!
Gel Print Kids Art Activity perfect for homemade diy valentines -- uses gelli plates -- finished with gold detailing
For the final touch, we removed all of our masks and added gold detailing and lettering.  
Gel Print Kids Art Activity perfect for homemade diy valentines -- uses gelli plates -- finished with gold detailing
Since the heart masks are so textured and gorgeous, we decided that they needed to be saved!  So, we used glue to collage a few on our final cards.  
Gel Print Kids Art Activity perfect for homemade diy valentines -- uses gelli plates -- finished with gold detailing
If you want, you can also add a varnish on top of the paint to create a glossy shine to your finished card.  Be sure to let it dry COMPLETELY before putting in envelope! ​
FOLLOW US ON SOCIAL MEDIA

More Valentines Day Arts & Crafts Activities

Valentines Day Watercolor Painting Lesson Activity for Kids and Adults
Valentines Day Heart Paper Garland - Easy Kids Craft Project!
Easy slime recipes for valentine's day classroom parties -- perfect for the craft activity, science activity, or take-home favor!

More Printmaking Art Activities

Mix & Match Stamp Carving Project for Adults and Teens - Perfect for Spring Art Projects!
Printing with Preschoolers - Using foam stickers to make Block Prints
Art at Home - How do do Mono Printing using gelli plates (video tutorial)

Two Special Valentine's Day Slime Recipes

2/5/2018

 
Valentines Day Slime Recipes perfect for classroom parties...art activity, craft project, science experiement, and take home favor!
If you need a fool-proof slime recipe for next week's Valentine's Day parties, we've got you covered. 

​These two slime recipes are sure to be a hit with your loved ones.  Watch the videos for our best tips to making this process as successful and mess-free as possible!

Valentine's Day Puffy Slime
Light and airy.  Like playing with fresh-smelling marshmallow dough.  This slime is great by itself, but for extra special occassions, try making a few different colors (different batches) and and swirl together to create a beautiful visual effect.

Click the video link below to watch our facebook live video for the recipe and instructions:
SLIME INGREDIENTS:
  • Shaving cream
  • White glue
  • Liquid watercolors or food coloring
  • Water
  • Borax solution* or saline solution
*See below for borax solution instructions.
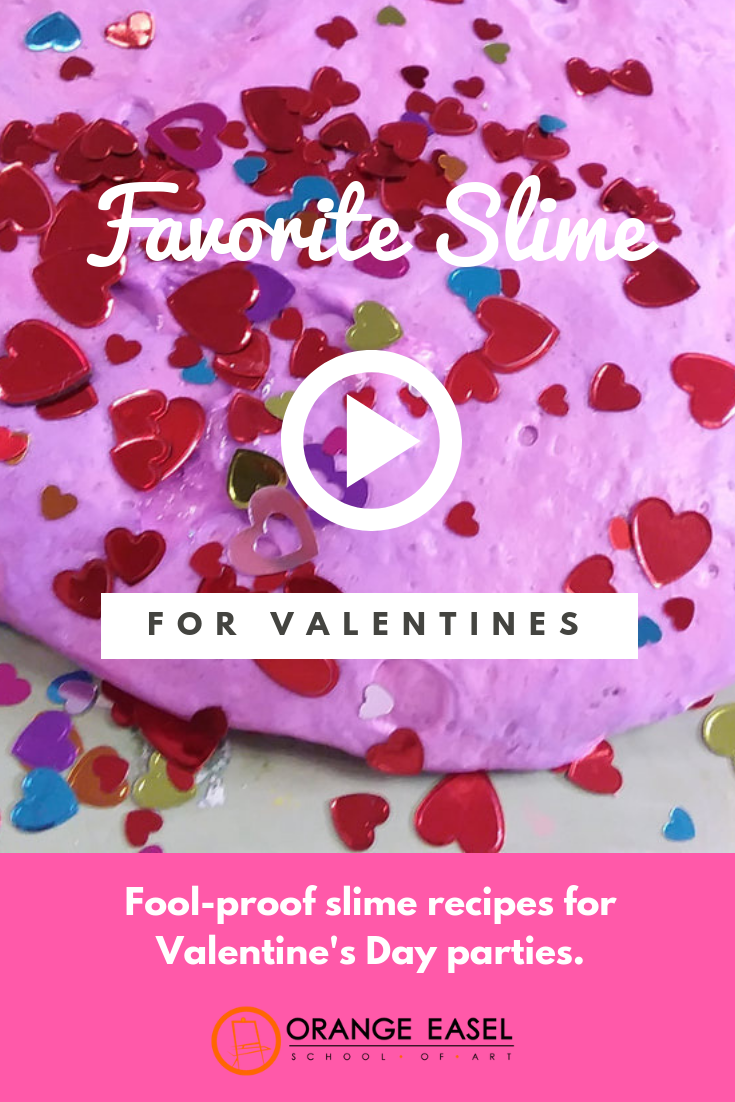
Valentine's Day Slime with Heart Confetti and Glitter
This slime is more dense than above and made with clear glue so that those pretty, sparkly add-ins can really shine. 

Click the video link below to watch our youtube video for the recipe and instructions: 
SLIME INGREDIENTS:
  • Clear glue
  • Liquid watercolors or food coloring
  • Water
  • Borax solution* or saline solution
  • Valentine's Day confetti
  • Glitter
*See below for borax solution instructions.
Borax Solution for Slime
Glue and water and glitter by itself doesn't make slime.  We need to create a chemical reaction in order for that liquid concoction to change into a non-Newtonian fluid (like slime).   In the studio, we almost always use a borax solution to make our slime.   There are other options, like liquid starch and contact lens solution.  Why do we use borax?

The ingredients we need to make the slime happen is the boric acid and sodium borate, both are active in borax.   They are also in most contact lens solutions which is why you'll see some slime recipes call for saline. 

The advantage to the contact solution is that these chemicals are already diluted and ready to use.  The disadvantage for our studio--because we make SO MUCH SLIME--is the cost.  It's much more cost effective for us to buy a box of borax and make our own solution and transfer that solution into our own squeeze bottles.  If you're interested in doing the same, we've included the recipe and video below.
INGREDIENTS:
  • 1 C warm water
  • 2 tsp borax
Mix stir together until combined.  Transfer mixture into a squeeze bottle for easy application.

More heart art:

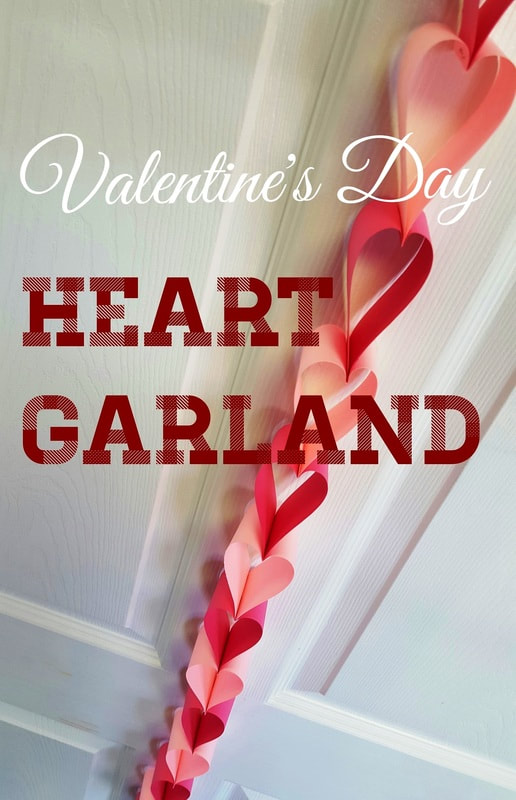
Check our how to make this paper heart garland: 
    ORANGE EASEL

    Orange Easel

    Content inspired by the artists and art created in our studio.

    Picture
    Orange Easel began as a small art studio in my basement and continues to grow and serve our community.  Read more about our story here.

    Archives

    February 2019
    January 2019
    December 2018
    November 2018
    October 2018
    September 2018
    August 2018
    July 2018
    June 2018
    May 2018
    April 2018
    March 2018
    February 2018
    January 2018
    November 2017
    October 2017
    August 2017
    June 2017
    May 2017
    April 2017
    March 2017
    January 2017
    May 2016
    March 2016
    February 2016
    January 2016
    November 2015
    October 2015
    September 2015
    August 2015
    July 2015
    June 2015
    May 2015
    April 2015
    March 2015
    January 2015
    December 2014
    November 2014
    October 2014
    September 2014
    August 2014
    May 2014

    Categories

    All
    2014 2015 Curriculum
    2014-2015 Curriculum
    2015 16 Curriculum
    Art History
    Art Projects
    At Home Ideas
    Charcoal
    Child Development
    Christmas
    Color Mixing
    Drawing
    Event Photos
    Halloween
    Ink
    Kansas City Love
    Kindergarters
    Metal Arts
    Middle School
    Miss Allison's Art
    Mixed Media
    New Years
    Orange Easel
    Paint
    Painting
    Parenting
    Preschool
    Preschool Art
    Preschool Playtime
    Printables
    Printmaking
    Recipes
    School
    Sculpture
    Sensory
    Slime
    Special Needs
    Springtime Art
    Storytime Art
    Student Art Gallery
    Summer Classes
    Tips
    Toddler Art
    Tutorial
    Tutorials
    Valentine's Day
    Videos
    Yarn

    RSS Feed

Picture
LIBERTY STUDIO
​249 W Mill St Ste 107 
Liberty MO 64068
816-407-9266
PLATTE WOODS STUDIO
7617 NW Prairie View Rd
Kansas City MO 64157
816-216-7126
Copyright © 2014 Orange Easel. All rights reserved.
Privacy Policy
Photos used under Creative Commons from r.nial.bradshaw, a.pasquier, Steve A Johnson, wStrauss, BLW Photography, daspader, shawncampbell, USFWS Headquarters, Joybot, HomeSpot HQ, creations by e.b.shumate, chefranden
  • Summer 2019
  • Orange Easel e-Classes
  • Kids Classes
  • Birthdays
  • Beyond Classes
  • For Current Students
  • Orange Easel Blog
  • Contact Us or Find Us
  • Calendar
  • Special Events
  • FAQs
  • About Us