
|
This post may contain affiliate links.

Our SPLATTER-painted speech bubble in progress
We even did it once with ACRYLIC paint as a permanent installation: 

Finished speech bubble with chalkboard
Want to know how we do it? It's really an easy set-up. (Clean-up is another story)
HOW TO SPLAT PAINT
Step 1 - Cover your wall in butcher paper.
Understand, the paint will splatter outside of this paper. Paint splatters EVERYWHERE. We wash our walls every weekend; we have a glossy paint on the walls, and the paint wipes off with elbow grease and water. Cover your baseboards if they are white. Nothing worse than scrubbing baseboards. If you don't want splatters on your ceiling, cover it about five feet out from the wall. Step 2 - Fill containers with paint. You'll probably want to use washable paint. If you're looking to do something permanent like our speech bubble, you need to spend LOTS of time on step one. We use a washable tempera paint made by Colorations. Thin the paint slightly with water. The thinner the paint, the better the splatters. But, if you get it too thin, you'll have dripping, running paint on the wall. Think of the consistency of melted ice cream. Step 3 - Get some cotton balls. We use about 100-120 cotton balls for five cups (40 fluid oz) of paint. It usually takes our artists about 10 minutes to get through 100 cotton balls. We use regular size cotton balls, but the jumbo ones work too. Step 4 - Set up a clean up station. We think it's easier (and faster) to do clean-ups with a basin of water instead of sink. You're really just looking for "clean enough". (i.e., Clean enough to grab another cotton ball) We have a dish pan from dollar tree that we fill with a couple inches of sudsy water. Place some towels under the bucket to catch any water that gets splashed outside. Place a couple hand towels (or bath towels) nearby to dry hands. This keeps the floor safe--more on that later. Step 5 - Go over the rules. Our only rules are that: You aim at the wall (we understand that sometimes we miss). You look before you throw (no throwing paint balls at other people). You WALK instead of run, skip, gallop, spin, sprint, etc (the floor gets slippery) Step 6 - PAINT! We like to turn up the music really loud for this part. Splat Painting VideoSafety, Best practices and clean-up notes
Our floors get really slippery.
It's caused by the combination of paint splatters from the wall, paint drips from transporting the paint balls, and watery hands from artists who are too eager to dry them off thoroughly. Our instructors constantly wipe the floors with large bath towels. We're not trying to CLEAN the floors. Just dry them off! Barefoot is best. In our studio, we go barefoot for splat painting. Our paint is washable. But that doesn't mean that mom wants to wash your shoes. Document it. Action shots are really fun but hard to catch. We like to take video to catch the action. Afterwards, we ALWAYS take a group photo in front of our masterpiece! Mop the wall. In three years of splat painting, we've cleaned a lot of walls. At the Orange Easel studio, we clean up our walls by mopping them! We have a large wet mopping pad from Norwex that we use; it reaches the high corners and the large scrubbing pad covers a large surface area on every swipe.
If you splat paint, we'd love to see that photo that you took...send it to us so we can see your masterpiece!

0 Comments
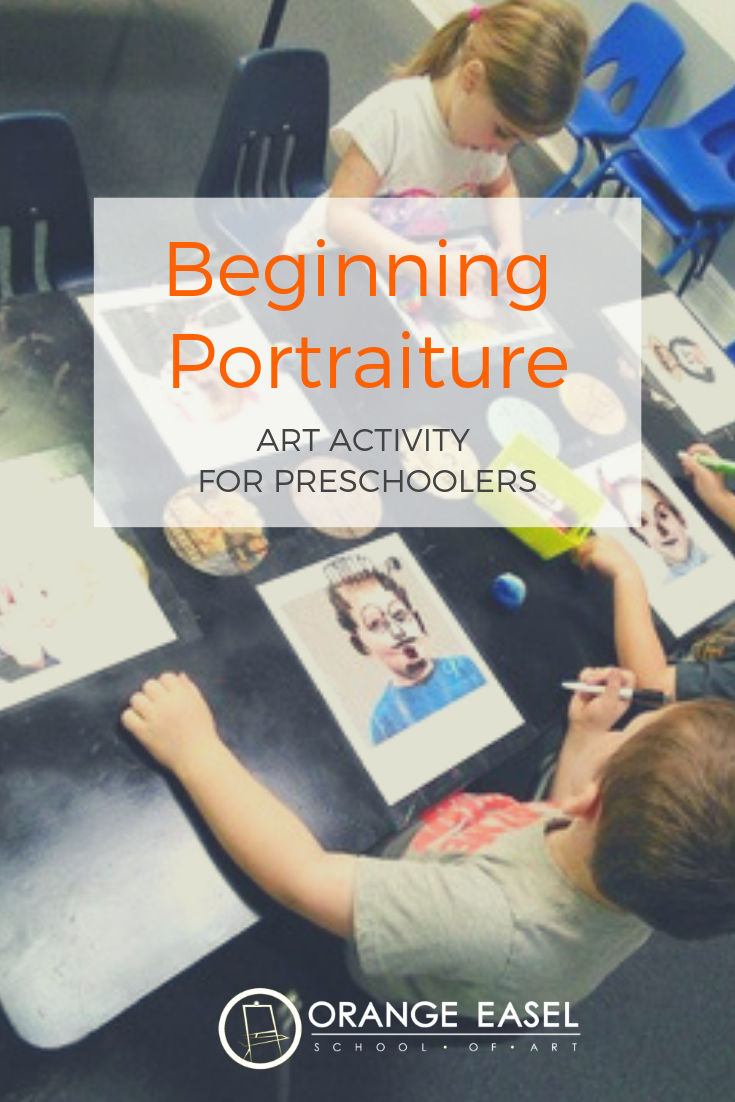
Art Activity Set-up
For our classes this week, we taped color photos to the table using clear packing tape. The photos are just printed from a google image search. You could also use photos from magazines.
An alternative to the packing would be to laminate your printed pictures or to place them in plastic page protectors. We set up our tables prior to the start of class. All that's left to do is play! The Art Invitation
Using dry erase markers, the artists can trace eyes, noses, mouths, ears, eyebrows, hairs, etc. Just for fun, we also added mustaches, glasses, hats, and other accessories!
We erased our drawings with colorful pom poms! 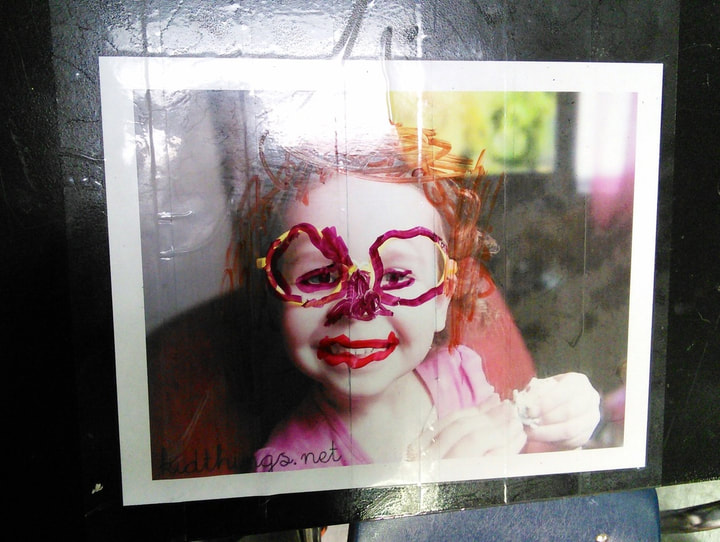
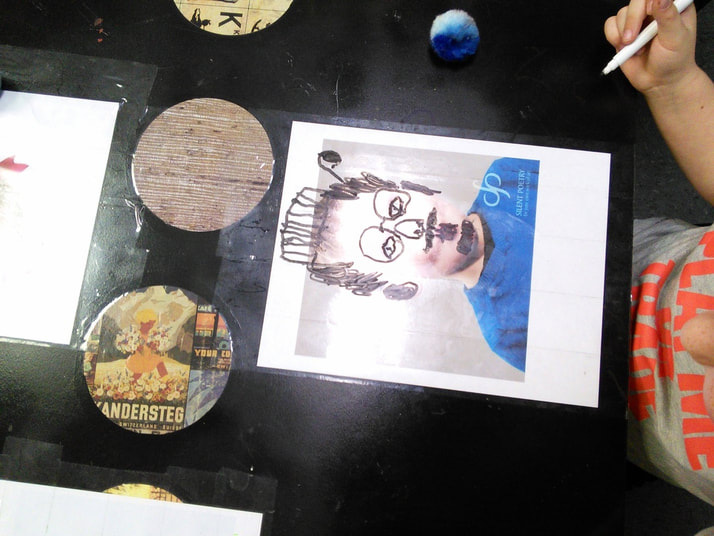
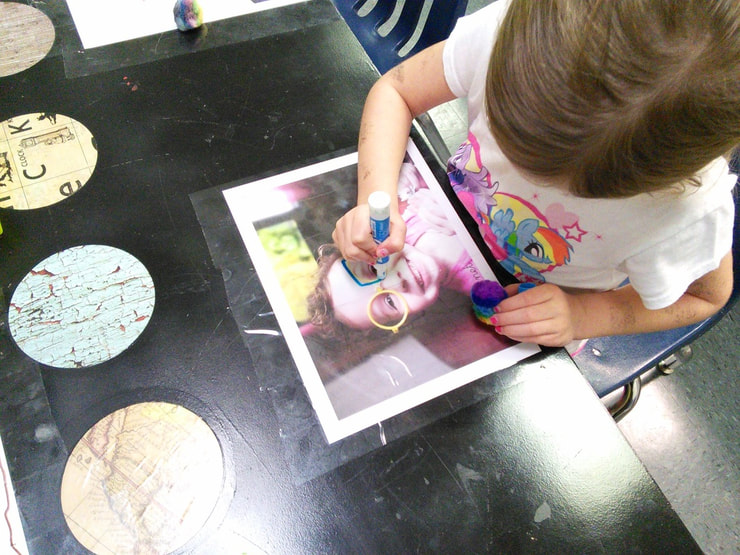
There were so many giggles during this drawing activity. And some really wonderful conversation. Some of our artists added accessories to the portrait but many of them simply reinforced the features that were already there...tracing over the eyes, coloring in the mouth, following the path of the nose, etc.
It was a playful and non-intimidating way to introduce portraiture to our class! I hope you get to try it out in your room! 
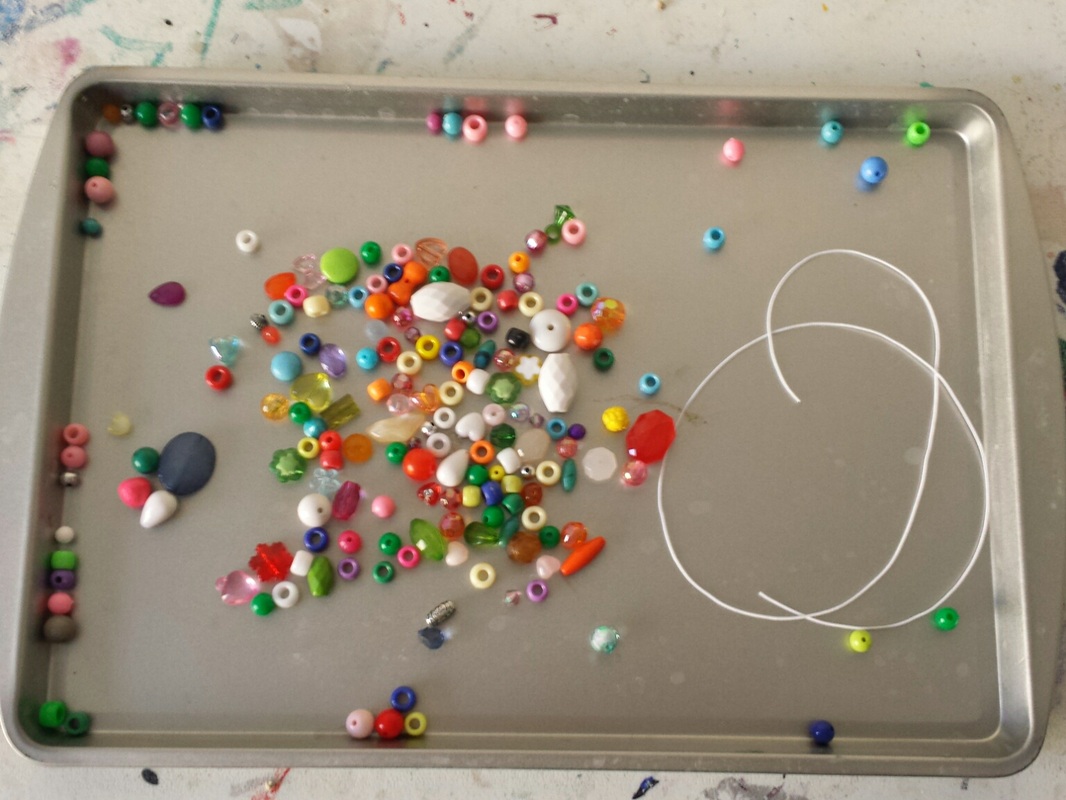
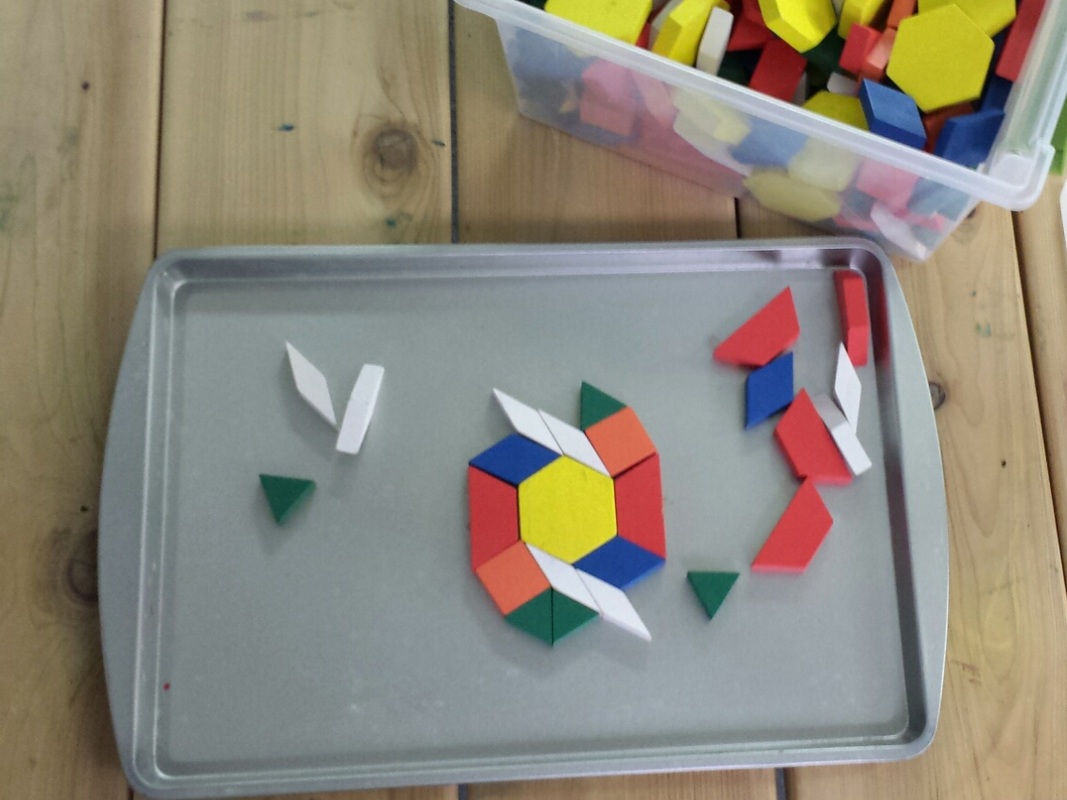
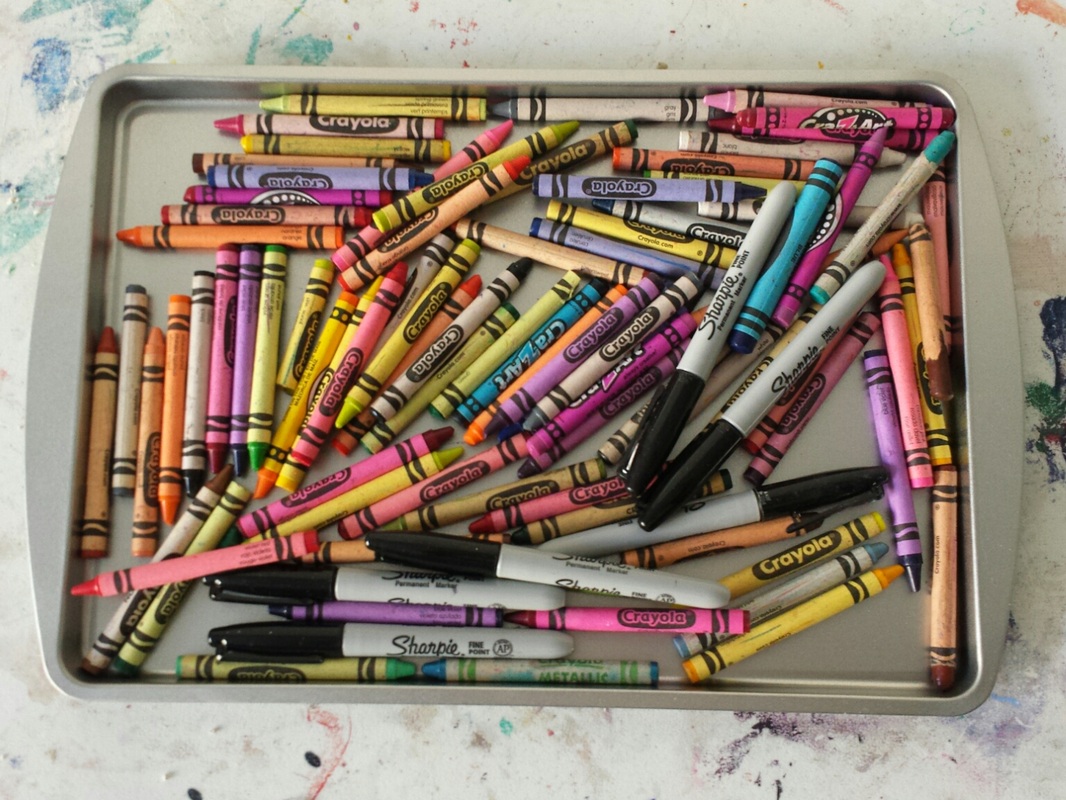
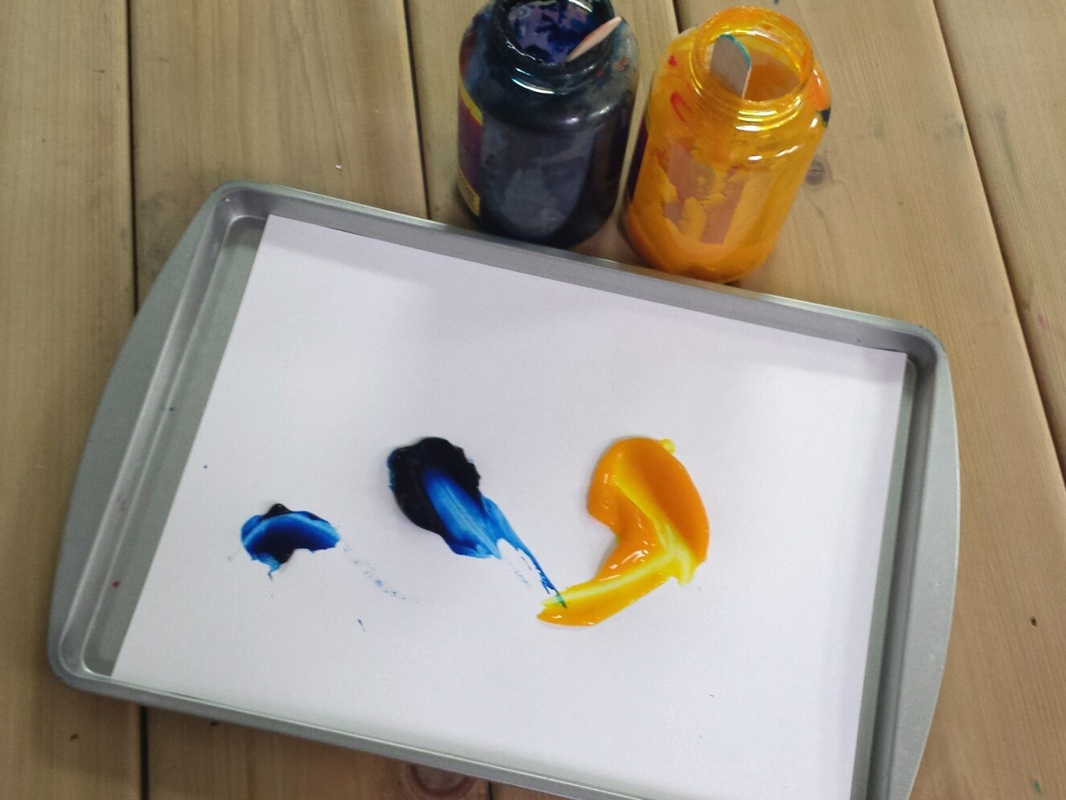
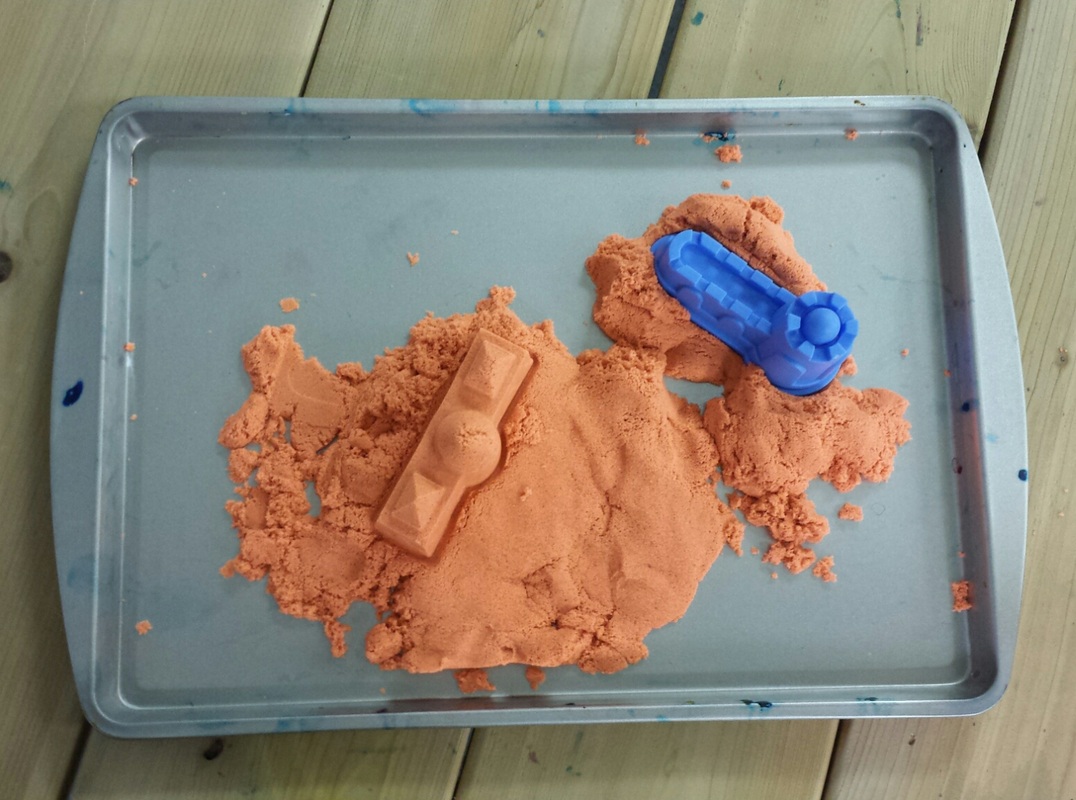
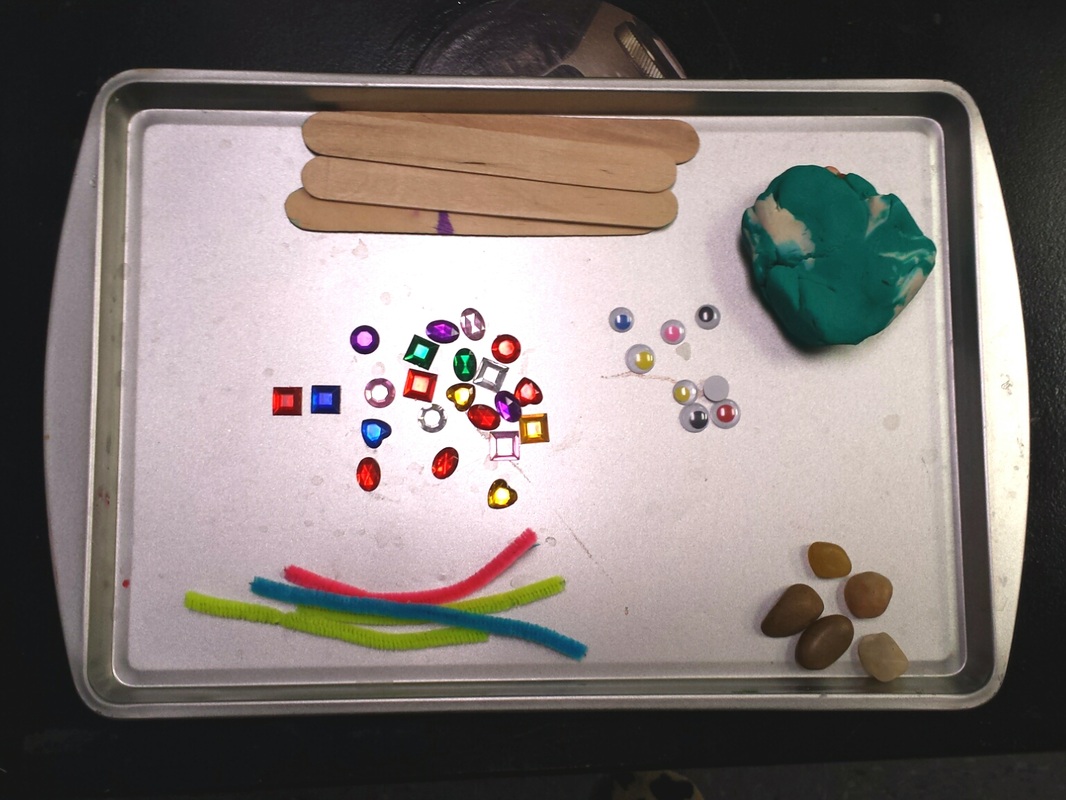
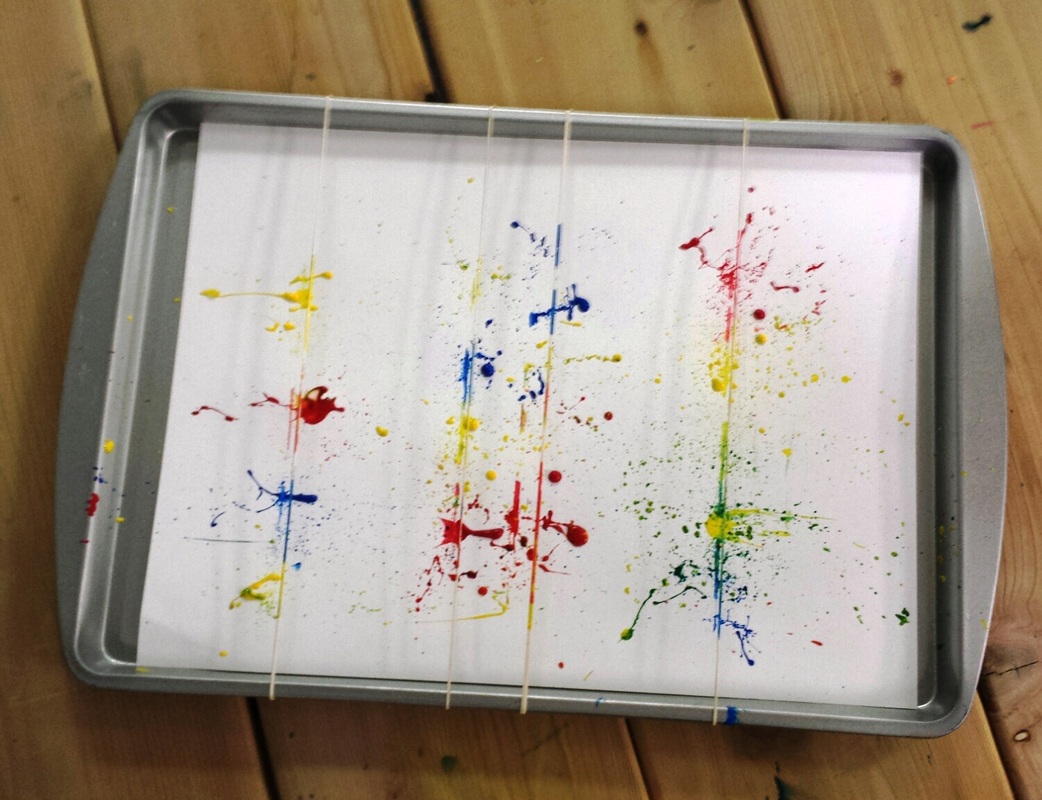
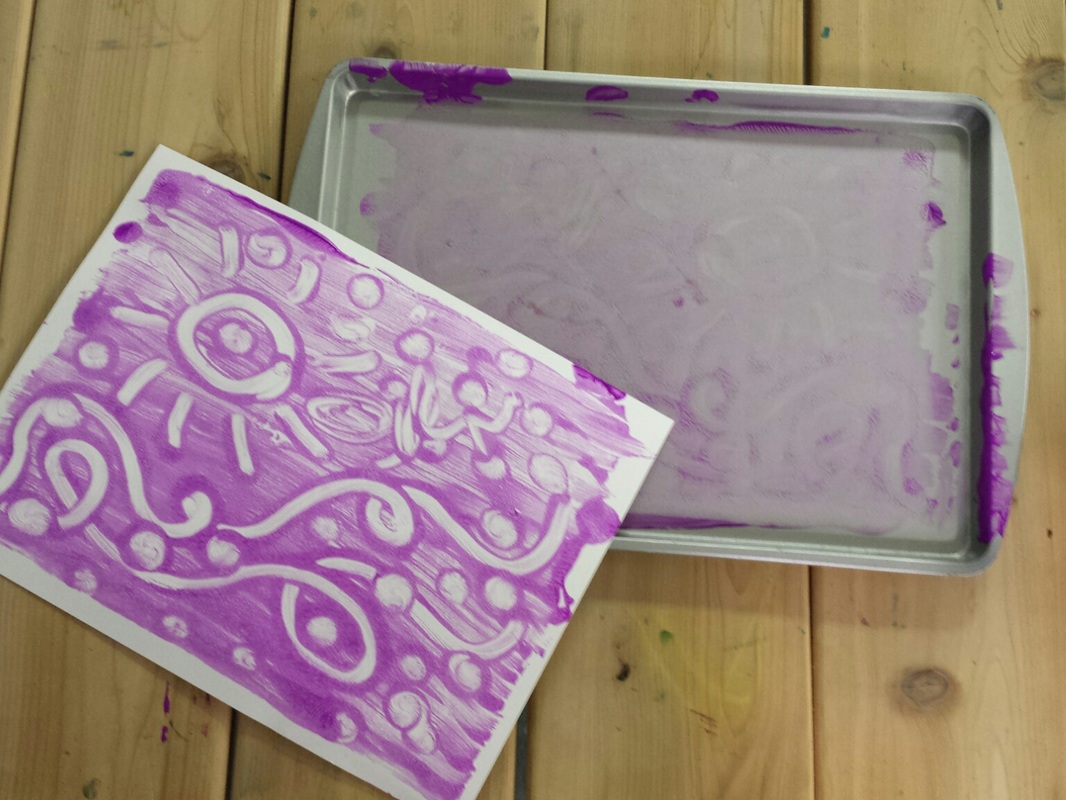
This is the first post in a series of a LONG line of posts about treasures we find at the dollar store. Some of our best "art" supplies come from Dollar Tree! First up...cookie sheets! We love 'em. We use them for all sorts of things. Especially when it comes to organizing our activities. Check out the EIGHT different applications below! (I'm sure they make great cookies too.)
Tell us below in the comments...What would you use them for?
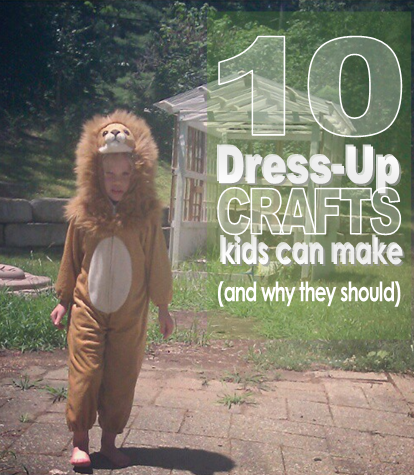
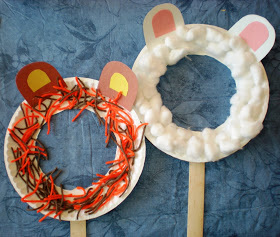
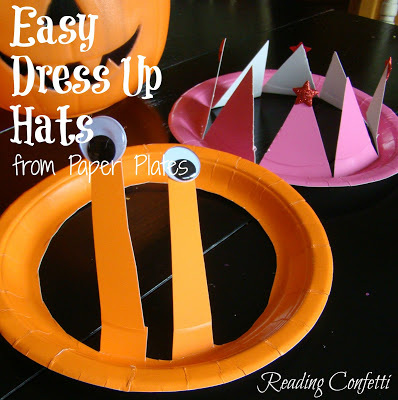
With Halloween around the corner, we're doing quite a bit of dress-up play in the Orange Easel studio. Wait...what? Dress-up? Is this ART??? 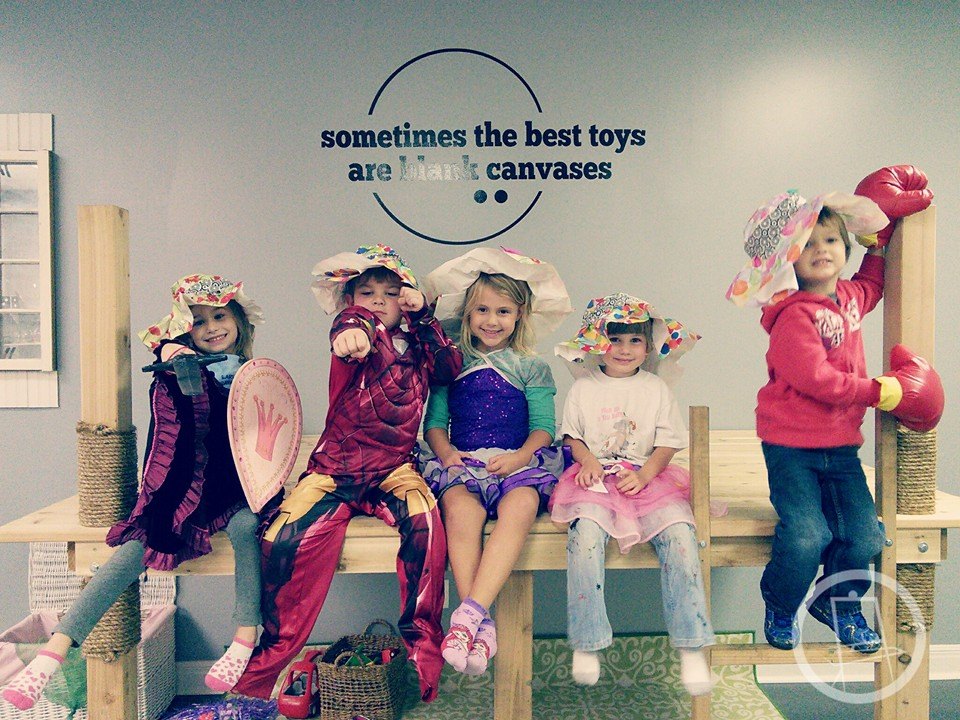 Playing dress-up exercises the imagination through role playing, acting, and plot development. Done properly, the game of dress-up demands a large selection: garage-sale-treasures, out-dated accessories, old Halloween costumes, and dance recital dresses. But, we believe that the dress-up bin has the potential to include a variety of homemade (CHILD-made) items. There's the possibility for CREATION. And THAT is the Art.  These are the types of invitations we're setting-up this month in the studio. Yes, there's still an Ironman costume, and a tutu, and a sword and shield. But where the supply is lacking there's the possibility of creation too. Encouraging the children to make their OWN costumes for play fosters an attitude of self-sufficiency, confidence, and independence. So, ORANGE EASEL doesn't have an Elsa costume? Let's make one! (And we're not talking about the picture-perfect one that you see on Pinterest that is a 24 page pdf pattern that Momma sew together. We're talking CHILD-directed, CHILD-created. It isn't going to look like something from the store. And that's okay. Actually it's better.)
Build your Dress-Up Bin
If your kids really get into making costumes, you can encourage this creativity and independence: keep a stash of recyclables, scrap fabric, old clothes, construction paper and craft supplies near your dress-up station!
What's the favorite item in your dress-up bin?
Local schools were closed today so we took advantage of the "FREE" day to be creative for a full SEVEN hours!
We spent ALL day making stuff. We doodled on the tables (covered with paper), threaded beads onto bracelets, made a large under-the-sea mural, practiced drawing facial features--because practice makes us better drawers--and then painted a colorful self portrait using ONLY the primary colors (and white). We even played a few games. What a fun bunch of young artists! Check out our 90-second video showcasing *some* of the art we made!
Click HERE to view on YouTube http://youtu.be/raAqzjPsitU
2014 WInter Break Camps
Camp schedules will be posted by Wednesday October 15th. Families currently on auto-enrollment may sign-up for camps beginning October 15th. Registration opens to the public on October 22nd.
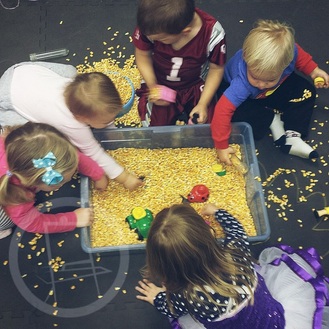
Get on our mailing list to be notified whenever camp registrations open! What is Sensory Play Sensory play includes any activity that stimulates your young child's senses: touch, smell, taste, sight and hearing. Sensory activities and sensory tables facilitate exploration and naturally encourage children to use scientific processes while they play, create, investigate and explore. 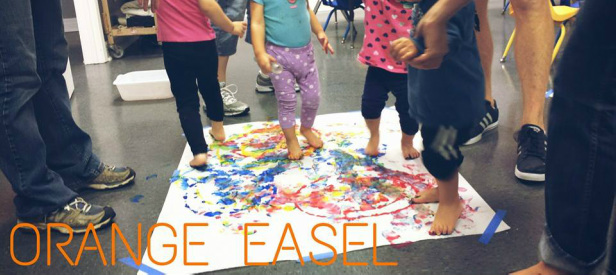 Foot painting in the ORANGE EASEL studio Why Sensory Play is Important Toddlers and preschoolers need MANY MANY opportunities to get hands-on. We learn through our senses...the more the better. Feel it. Hear it. Smell it. See it. Sensory play allows for self-discovery. The open-endedness of it encourages imaginative play and problem solving. Adults may not see "the point" of this type of play, since nothing is created or produced. The child dictates the play that happens based on what he or she NEEDS to learn...cause-and-effect, the concept of filling-and-emptying, small world reenactment, etc. Manipulating the sensory materials and tools also develops motor skills needed for future writing. Scooping and pouring requires core strength, shoulder stability and wrist rotation.
"Keep it in the tub" isn't one of our rules. It takes quite a bit of skill to "keep it in the tub" and it's not realistic to expect that of our little hands who are JUST learning to scoop and pour with precision. A broom and a shop vac make quick work of clean up (bonus: most kiddos love using the shop vac) A Special note For big kids It's easy to think that this type of play is only for the five-and-under crowd, but we encourage you to rethink that. Older children enjoy this type of play JUST as much as the little ones. Give them permission to explore and play. They are still kids too. Ideas For Sensory Play For specific sensory play ideas check out our "Sensory Play" Pinterest Board:
Show your Kansas City Spirit This Halloween!Since they're PLAYING in October, it just makes sense right? We've got a pumpkin carving template just for you die-hard Royals fans!
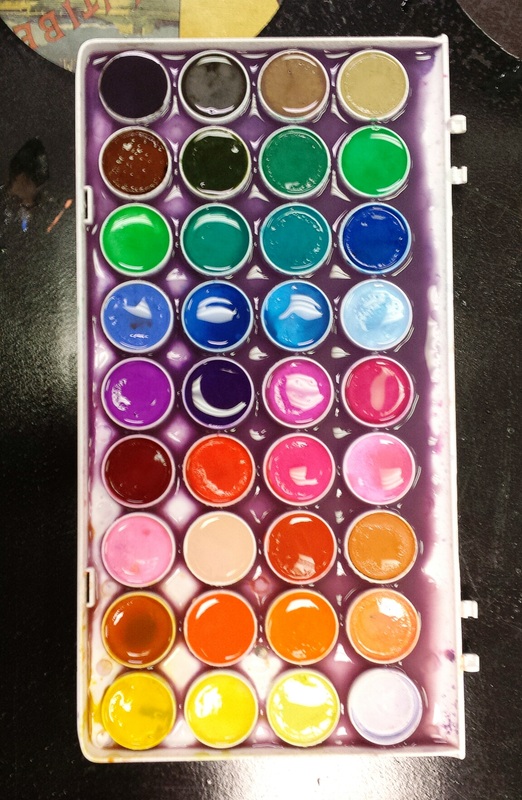
We made some watercolor hand prints in the studio this morning. Yes, you read that right! Hand prints from WATERCOLOR palettes! If you haven't used this type of paint to make hand prints, you should give it a try!

We used a watercolor paint tray (it's the Artist Loft brand from Michaels). Using a spray bottle we saturated the paint cakes. (That's our students' favorite part.)
I love the rainbow the colors that make up the hand print and the little splatters that just happen! Give it a try and let me know how it goes!


Because Everything Should Smell Like Pumpkin Spice
|
Orange EaselContent inspired by the artists and art created in our studio. 
Orange Easel began as a small art studio in my basement and continues to grow and serve our community. Read more about our story here.
Archives
April 2024
Categories
All
|

)


 RSS Feed
QUICK LINKS
|
|
|
|
LIBERTY STUDIO
249 W Mill St Ste 107 Liberty MO 64068 816-407-9266 |
PLATTE WOODS STUDIO
7617 NW Prairie View Rd Kansas City MO 64157 816-216-7126 |
|
Copyright © 2023 Orange Easel. All rights reserved.
Privacy Policy |
|