
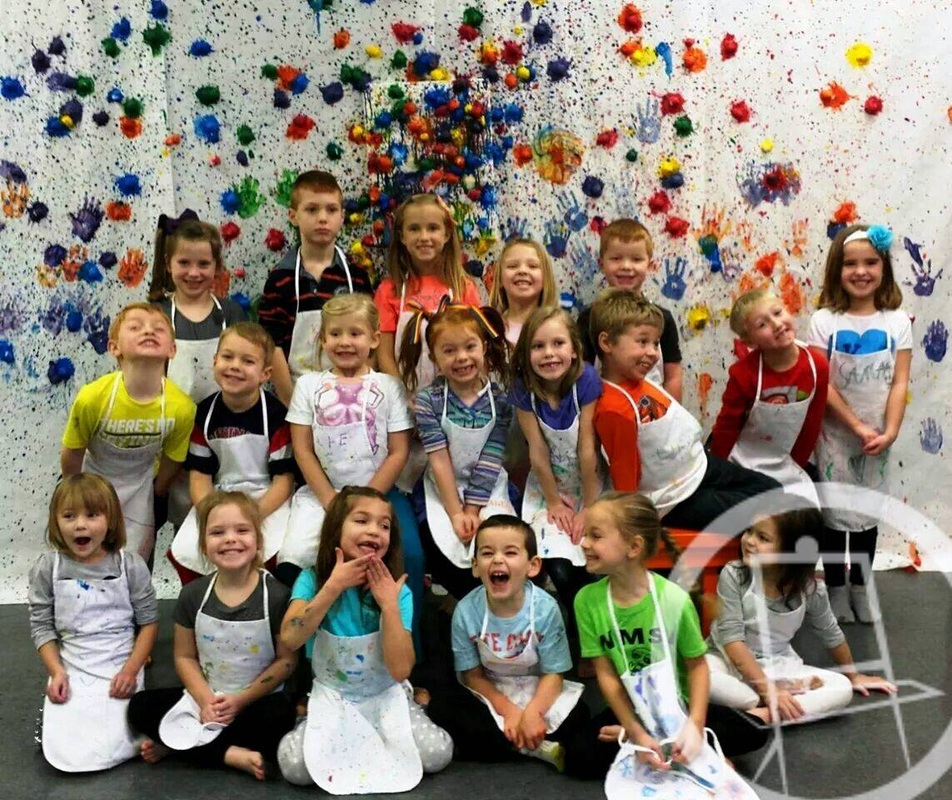
 80% of our phone calls and emails are regarding our amazing birthday parties. Here are a few quick notes regarding these celebrations!
0 Comments
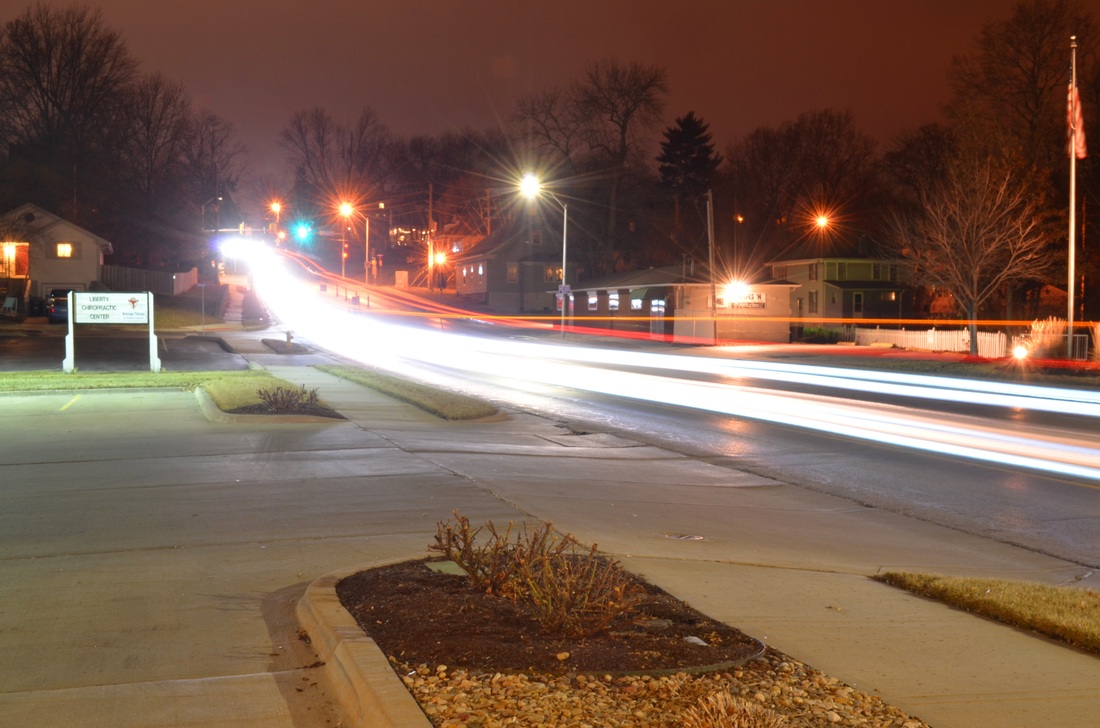 Our adult photography class played around tonight with extended shutter speeds. There are some really wonderful effects that you can do with your camera if you DARE to put it on manual mode. Before you attempt it, you need to understand that there are only three ways that a photographer can control the light hitting the film (or digital sensor): SHUTTER, APERTURE, and ISO.
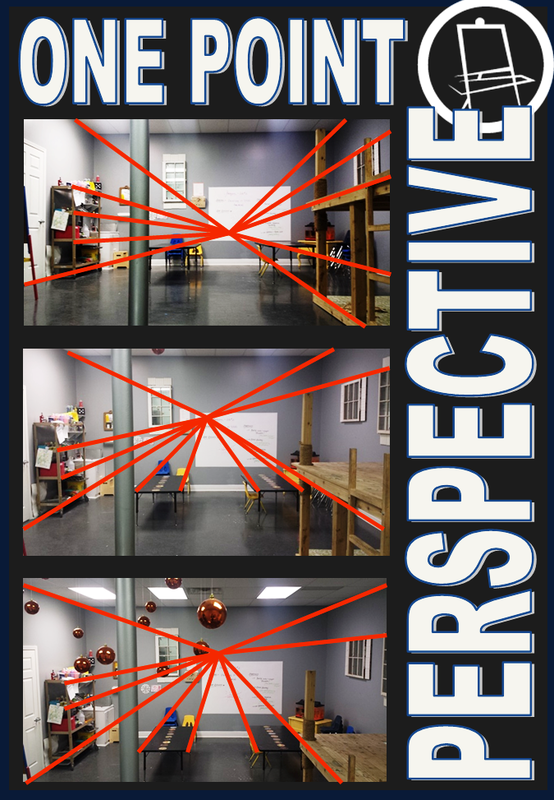
The first thing to identify is the vanishing point. Your vanishing point is at eye level of the viewer. If you're creating a drawing from your own creative brain, this is important to know -- because where ever you set your vanishing point, you "put" your viewer there.
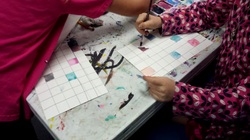
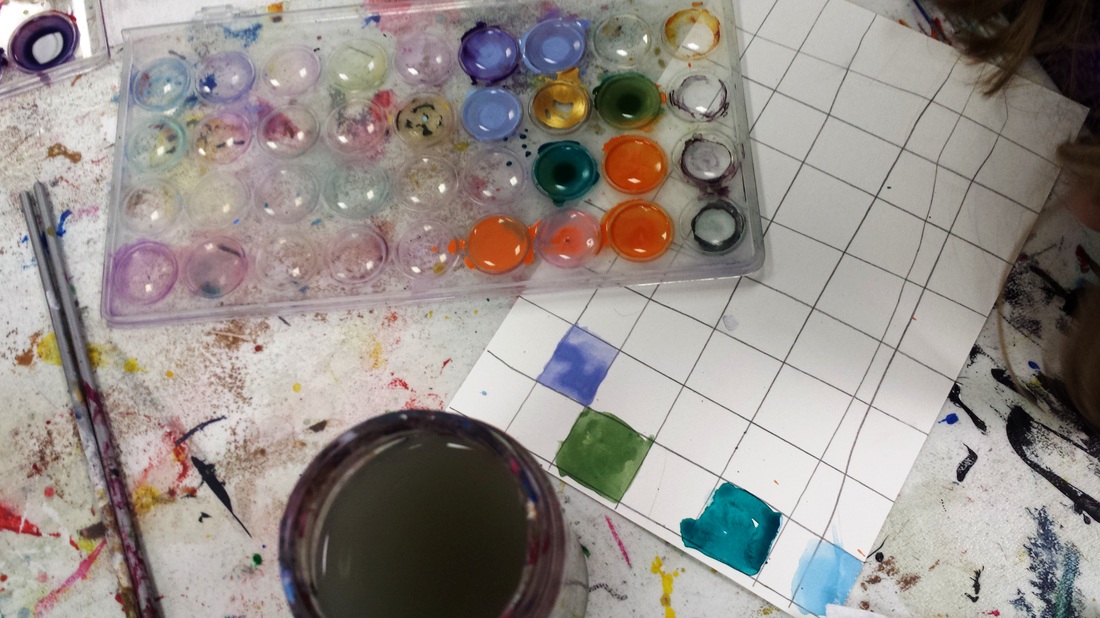
Take a look at the photos above. The vanishing point is higher and lower because the camera was raised and lowered. Notice that the bottom photo is the perspective of a REALLY tall person but the top photo is taken from the perspective of a small child. The vanishing point shifts up or down the depending on the viewer. Once you have your vanishing point established, the rest of the lines radiate out from the center. Table tops, table legs, shelves, mirrors, picture frames, baseboards...anything that follows the walls of the room. Assuming all of your furniture follows the walls, your drawing should be composed of only three types of lines: Vertical, Horizontal, and lines that radiate from the vanishing point. There are an INFINITE number of colors that you can make from one tray of water color paints! That's what our artists explored this week in class, while they practiced their brush strokes and paint control. 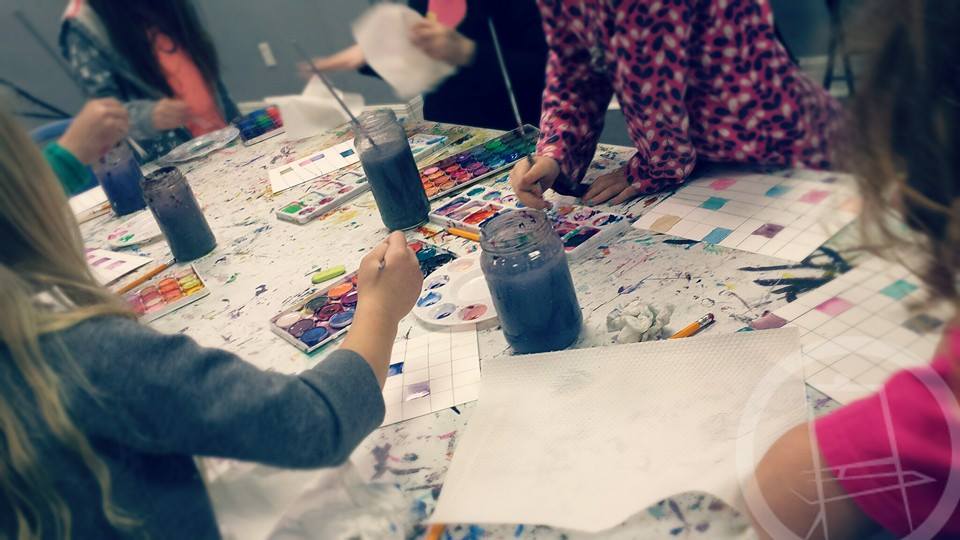
Any color, mixed with a small amount of another color, makes a new color. That new color can be lighted by adding water. Or darkened by added more pigment. Or changed ever-so-slightly by adding a little MORE of the second color. Gradients, shades, tints, oh my! How many different colors can you make?
We're still working through ours but we're hoping to fill page with NO REPEATERS!
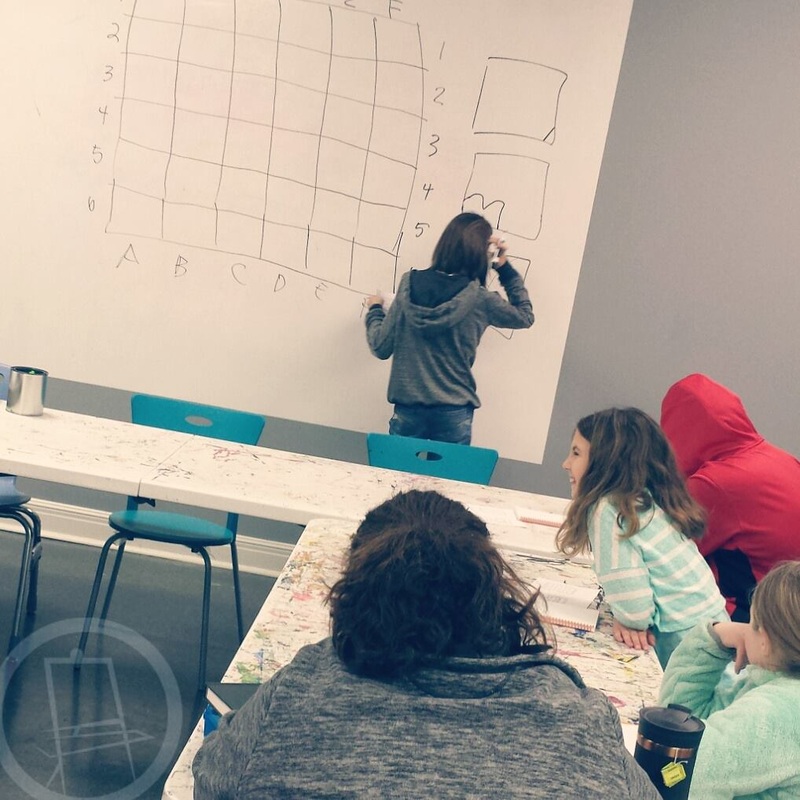
Our Drawing Fundamentals class has spent the last two weeks focusing on ACCURACY. Accuracy in rendering a subject, either from a photo or from still-life, is one of the first skills that we work on. Angles and shapes fit together in the proper scale and proportions. Talented artists who can render accurately have amazing EYES. It's not just the hands that draw. We would even argue that hands aren't even the most important tool in drawing. Drawing begins with the eyes and an awareness of how these angles and shapes fit together. 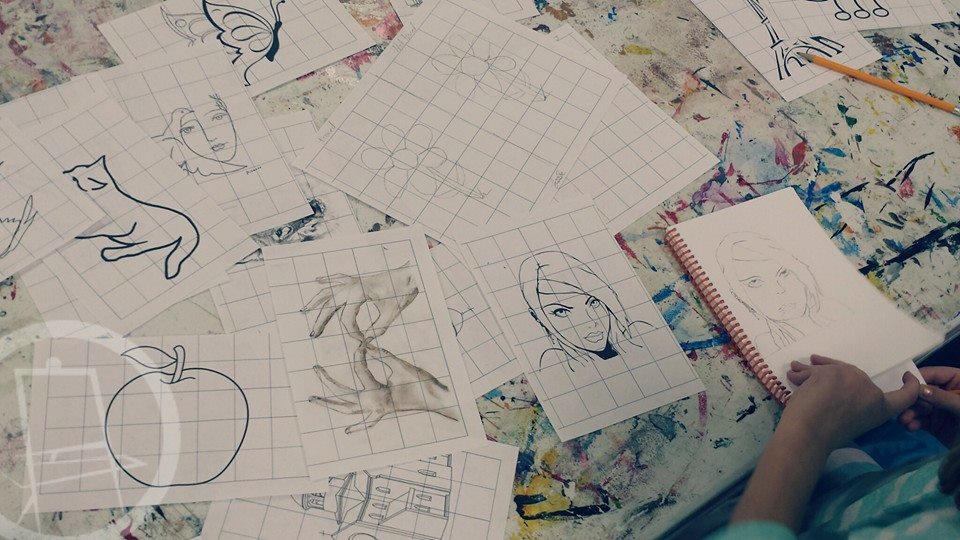
One of the best ways to train our eyes to SEE these relationships is through drawing on a grid. Grids break up the large page into smaller, more-manageable spaces. They give us a roadmap to follow. It's easier to plot a point and hit the target if we narrow the playing field! Below is an example of a simple grid drawing. 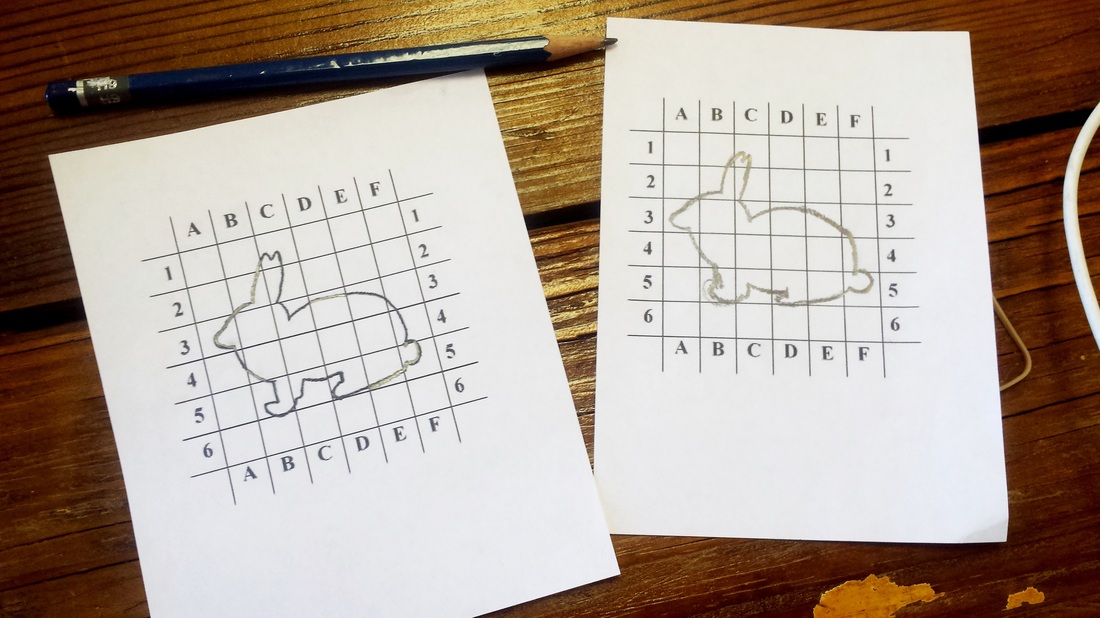
The original line drawing is on the left and the artist's rendering is on the right. Completing this drawing without a grid, is much more difficult! (We know. We tried!)
Click here to download a printable grid and simple line drawing that you can try at home!
(Easter-themed, because we're dreaming of spring!) We're spending our January the preschool room by focusing on science and art. We've got a full line-up of colorful chemical and physical reactions that produce art. On of our first experiments is making monoprints with bubbles! The result is a lacy, delicate painting. HERE'S HOW:You'll need: A pie plate, a small bowl, or something similar Food coloring A Straw Water Dish soap Paper OPTIONAL: We used a cookie sheet under the bowl for all the "runaway" bubbles! >> Read more about our uses for cookie sheets here Combine the food coloring, water, and dish soup in the bowl. It only takes a couple drops of dish soap to make some really great bubbles. The amount of food coloring you use will determine how dark or light your print is. Blow bubbles using a straw. Our young artists/scientist really liked blowing the bubbles until they overflow the sides of the bowl (hence the cookie sheet). Press the paper on top of the bubble-bowl. Voila! Video Clip of Bubble Printing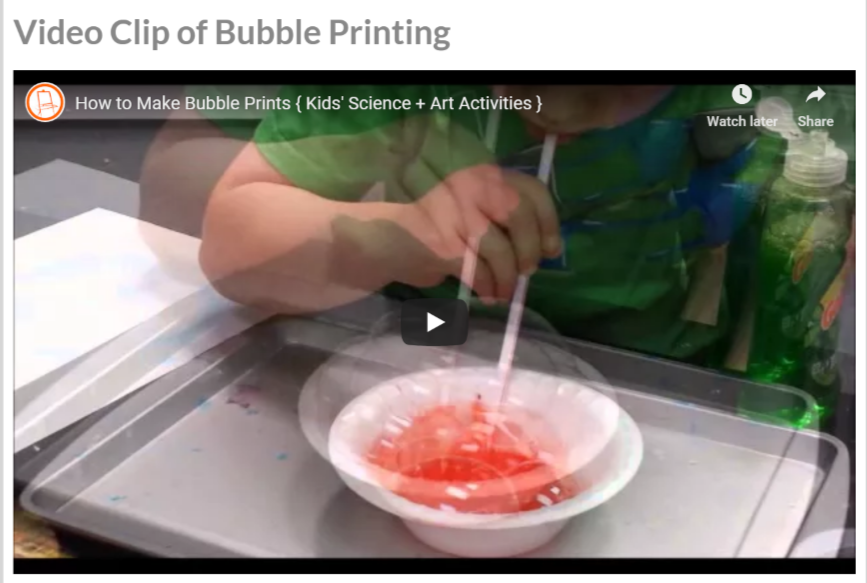 |
Orange EaselContent inspired by the artists and art created in our studio. 
Orange Easel began as a small art studio in my basement and continues to grow and serve our community. Read more about our story here.
Archives
April 2024
Categories
All
|
 RSS Feed
QUICK LINKS
|
|
|
|
LIBERTY STUDIO
249 W Mill St Ste 107 Liberty MO 64068 816-407-9266 |
PLATTE WOODS STUDIO
7617 NW Prairie View Rd Kansas City MO 64157 816-216-7126 |
|
Copyright © 2023 Orange Easel. All rights reserved.
Privacy Policy |
|