
|
Disclosure: This post contains affiliate links.
We began our class by reading the book, Freight Train by Donald Crews. When we sat down at the tables to make our art, we invited our artists to draw a horizon and create a train running along a track, just like in the book illustrations.  The swishy wet sponges, messy fingers, color mixing, and problem solving made this one of my favorite art activities of the year! The sponges make it possible for young artists to design and create a picture of simple shapes without actually needing to be able to draw or paint those shapes. We have three and four year olds with incredible creativity and vision--but they don't yet have the fine motor skills to bring their ideas to life. These sponges are completely age appropriate and allow them to be successful. Step-by-Step ProcessPreparationSupplies:
If you're working inside on your kitchen table, cover the work surface with butcher paper or newspaper--these sponges don't have handles so this one gets a little messy! Set out paper plates and fill each with one washable paint (we love this paint if you need a great washable one) color per plate . Fill wash bucket with water or have some wipes nearby. Create Your Sponge Shapes Using scissors cut a variety of shapes from your kitchen sponges. I kept it simple with rectangles, triangles, squares, circles, and ovals, but you can go as elaborate as you'd like (think, hearts, flowers, stars, etc).  We knew that our artists would be learning about trains that morning, so we made sure that our shapes fit together and were scaled properly for train constructions. This lesson would also work for buildings, cityscapes, houses, landscapes, or even animals (similar to our animal collage building here). If cutting out the shapes isn't your thing, you can always purchase some pre-cut shapes in the bath isle of a toy store for five to ten dollars a bag. Time To PaintYour artists can dip their sponge into the paint and stamp with it on the paper. Help them discover how they can build artwork by adding multiple shapes, creating things like houses, trains, or even people. Some artists will discover that if they drag the sponge across the paper instead of stamping, they can cover a large area with a single color. This method is useful for creating things like landscapes, ground, sky, and more.  Display ArtworkOnce completely dry, it's time to show off those masterpieces! Using a hole punch and string, you can create a banner of your child's work, or make a hanging loop on each piece. If your fridge is the family gallery, attach a magnet to the back for prominent displaying. Take it a step further by allowing the kids to sponge paint a picture frame for their art. Learning Benefits
With so many benefits in one fun-filled activity, how can you NOT try this one? As always we'd love to see pictures of your process and your work. Tag us in your photos @orangeeaselart on Facebook, Instagram, and Twitter! 
I hope you get to try it out with your kids!  Disclosure: This post contains affiliate links.  In our storytime art classes every summer, we share The Very Hungry Caterpillar with our preschool artists. The simple story line and surprise ending is captivating for our kids. While we read, we love to highlight the unique way that Eric Carle created his beautiful illustrations. The primary art invitation in this storytime class is creating collages of painted paper, just like Carle. COLLAGE ART Every child can be successful with a collage invitation like this one. Unlike drawing, it doesn't require a proper pencil grip or the fine motor skills needed to control a brush. This method of art is less like drawing and painting and more like constructing and building.
 Step by Step TutorialStep 1: Prep the paper Gather your paint, paper, and texture tools, including your homemade ones, and start painting. You'll need a variety of colors and textures. We prepped whole sheets of paper and once they were dry, we cut them into quarters for manageability. Since we only get to see the artists ONCE for a 90 minute class, we prepped all of our paper ahead of time. But, you can easily break this up into two lessons and have the kids make the paper one class and use it in another. As an alternative, if you'd rather not paint paper, try using photos from magazines for your collage. Look for texture in the photos--A wheat field, a forest, a sunset, a bunch of rocks, etc 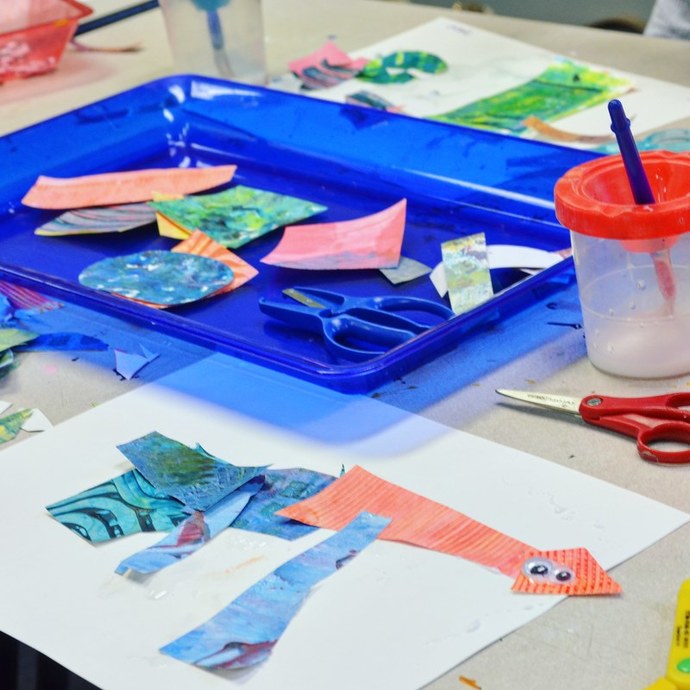 Step 2: Share the Story and Demonstrate Technique Share the story, making sure to poing out the illustrations. Show your budding artists how to use various sized pieces of painted paper to create an animal. We used an easel at the front of the story area to walk through the steps of building an animal. We talked about shapes and positioning of each of the body parts. It's like piecing together a puzzle.!  Step 3: Cut and Design Back at the table, we provided scissors for our preschoolers to do their own shaping to the papers. It's so important that they get the opportunity to use this tool from a young age. We even have safe scissors that only cut paper and not hair! (A must have for every mom with a toddler!) These special scissors allow even the smallest artists to participate.
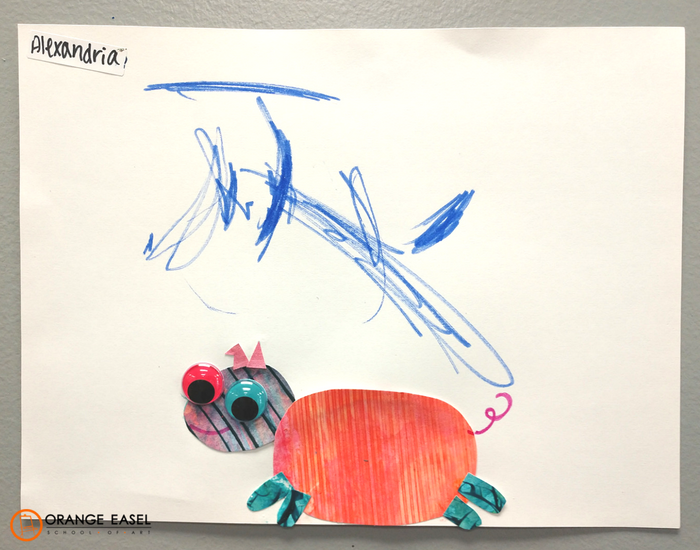
Step 3: Create a design On our tables, we have googly eyes, markers, scissors, and paper. If you wanted, you can add yarn, feathers, glitter, etc. Some of our children lay out their design ahead of time, and then glue it. Others just grab accessories, like the always popular googly eyes, and glue them on the paper. Every approach works!

One of the great things about polymer clay is that it doesn't dry out, making it unnecessary to store it in an airtight container. Any extra material can be easily saved and used for future projects. (Hint, if you like dragons, you'll definitely want some extra material for later on.)
I am excited to craft with you, so click the tutorial below and let's get started!

Video Tutorial
Follow along with us on our facebook live broadcast:
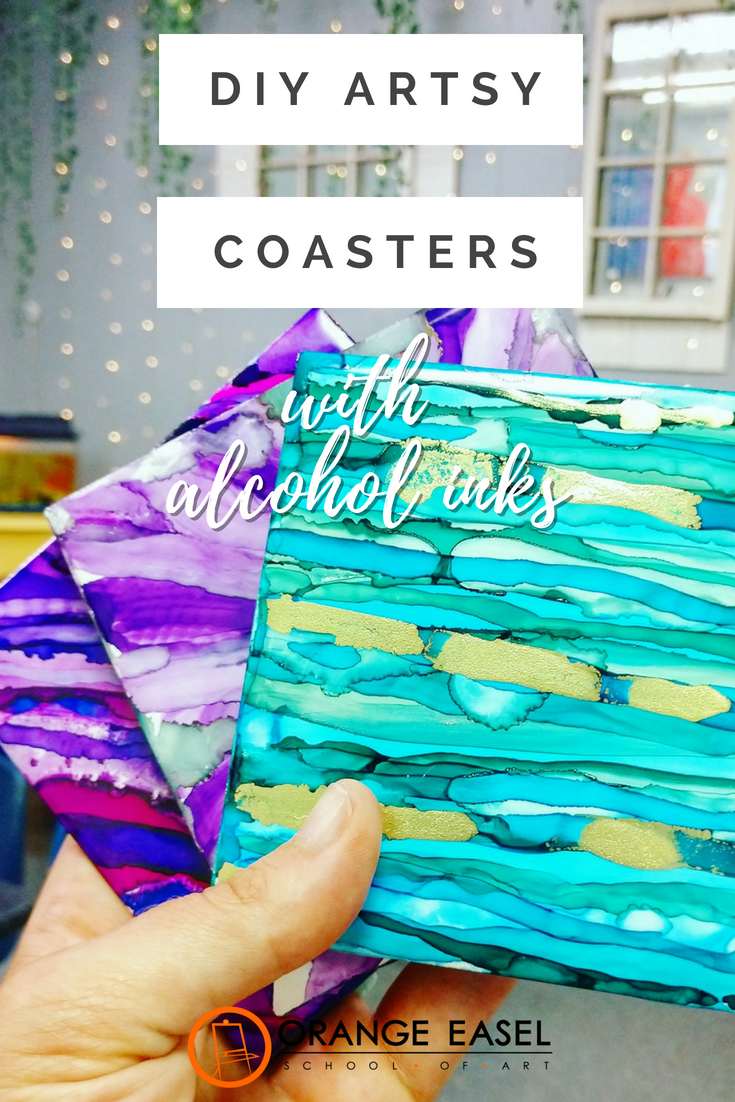
Alcohol ink is highly pigmented, typically comes in really small bottles (ours are 0.5 ounces), and can be used in a variety ways--see our pinterest board for more ideas! A detailed video tutorial for our coasters is provided below, so gather up your supplies and start creating! 
Video TutorialSee more art activities using these inks:
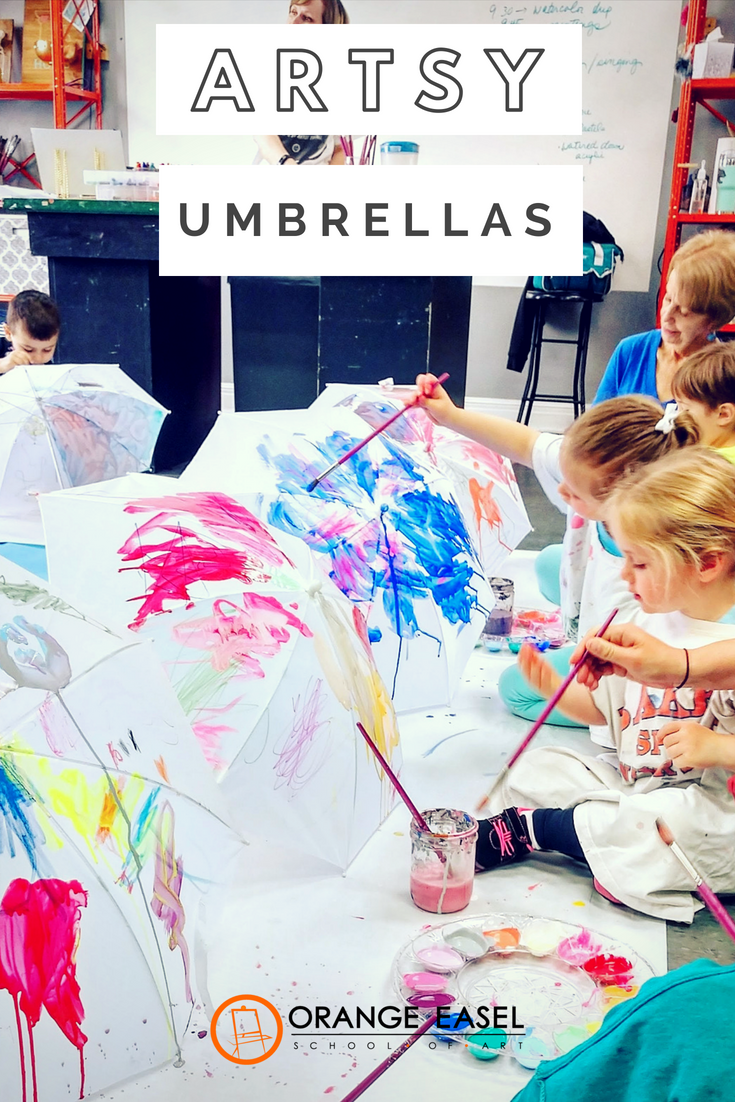
Some of our artists made designs and painted concrete subjects while others simply covered the entire surface with their artistic style. Whatever the outcome, it's always the process that we cherish; we know the kids had fun with this invitation and we're excited to share the "how to" with our fellow teachers and parents. Can you imagine how adorable this would be for a summer backyard birthday party? Or a VBS activity? And, when the umbrellas are complete, they are actually useful! At the bottom of this post, we've compiled a list of 10 ways to utilize these art pieces after the activity is over.  If you're local to the Kansas City metro, this class WILL be on the schedule in the 2018-19 school year! Join our mailing list to be the first to learn about new classes. DIY Artful UmbrellasStep 1: Cover Your Surface and Your Artist We used our blue butcher paper to protect the floors from drips and spills, but newspaper, trash bags, or a vinyl tablecloth would work just as well. Since we're using non-washable paint, be sure to put an over-sized shirt, apron, or old clothing on your painter to prevent staining nice clothes.  Step 2: Gather Supplies For this project you'll need:
 Step 3: Decorate We began our invitation by drawing on the umbrella with oil pastels. You could definitely skip this step if you wanted and go straight to painting. Our older kids liked drawing their designs first, but the younger one couldn't have cared less! Big brushes worked best--this is a LARGE surface to cover so don't be afraid to get out the chunky brushes, or even the house paint brushes so that you can get some coverage. It would also be fun to use a black or dark-colored umbrella and challenge them to create a galaxy or starfield design!  Step 4: Drying Leave the umbrella open and let it air dry 24 to 48 hours, depending on how saturated it is.  Step 5: (OPTIONAL) Once the umbrella has dried, you can also use a clear gloss protective spray to cover the outside of the umbrella, the side that has been painted, to seal and protect the piece. If you plan to use the artwork as an umbrella in the rain, I do strongly recommend you put the protective top coat on.  Step 6: Enjoy The Creativity Now that the project is complete, here are some ideas on how you can use it.
If you enjoyed this tutorial, be sure to check out our DIY videos on YouTube for even more creative inspiration!  |
Orange EaselContent inspired by the artists and art created in our studio. 
Orange Easel began as a small art studio in my basement and continues to grow and serve our community. Read more about our story here.
Archives
April 2024
Categories
All
|


 RSS Feed
QUICK LINKS
|
|
|
|
LIBERTY STUDIO
249 W Mill St Ste 107 Liberty MO 64068 816-407-9266 |
PLATTE WOODS STUDIO
7617 NW Prairie View Rd Kansas City MO 64157 816-216-7126 |
|
Copyright © 2023 Orange Easel. All rights reserved.
Privacy Policy |
|