

This post contains affiliate links.
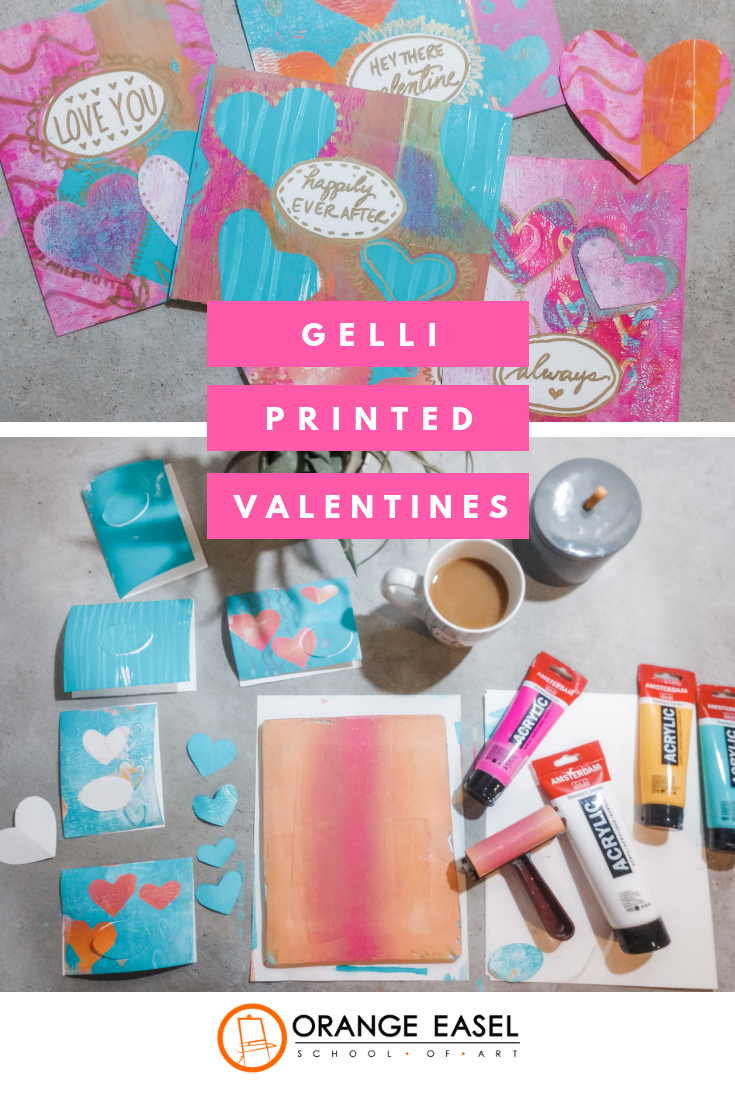
I adore these homemade, paint-printed valentines with metallic gold details. They are made using gel printing plates from Gelli Arts and the result is a layered, textured, one-of-a-kind Valentine. I hope you enjoy the tutorial below!

Printmaking Valentine Tutorial
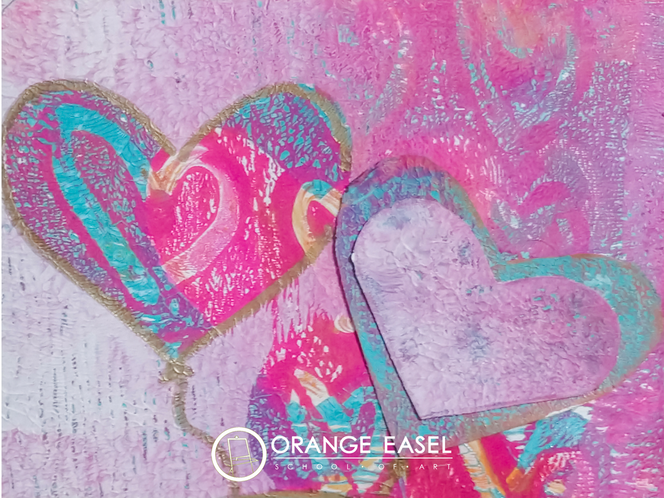
We started by picking a color scheme. We opted for coral, magenta, turquoise, and white knowing that the gold sharpie would be the perfect finishing touch. Gelli plates work best by layering pattern and colors, using masks each time you print so that the bottom layers peak through.

To make the masks, we cut hearts from the white drawing paper, making sure to keep both the positive hearts AND the negative mask. Both will be useful!

Since each layer has to dry a bit in between, we started by printing the bottom layer on all six cards. (You can work on one card at a time if you'd rather.) Each card was prepped with a center circle mask taped in place. Some backgrounds were gradients. Some were patterns. Some where solids.

Leaving the white circle in place on every card, we continued to the second layer. This is really something that ONLY makes sense if you play around with it! By placing a heart on a painted gelli plate, you allow the bottom layer to peak through on the card (in the shape of a heart). Conversely, but placing the negative mask on a painted gelli plate, you print the positive heart onto your card. Whew. Brainteaser.

You can do as many layers you want. Just keep adding patterns and masks to create depth to your prints. Use the q-tip to doodle a pattern into the paint before you print. Wipe your gelli plates off in between paint colors, especially if they are complimentary, so you don't end up with brown!

For the final touch, we removed all of our masks and added gold detailing and lettering.

Since the heart masks are so textured and gorgeous, we decided that they needed to be saved! So, we used glue to collage a few on our final cards.

If you want, you can also add a varnish on top of the paint to create a glossy shine to your finished card. Be sure to let it dry COMPLETELY before putting in envelope!
FOLLOW US ON SOCIAL MEDIA
More Valentines Day Arts & Crafts Activities
More Printmaking Art Activities
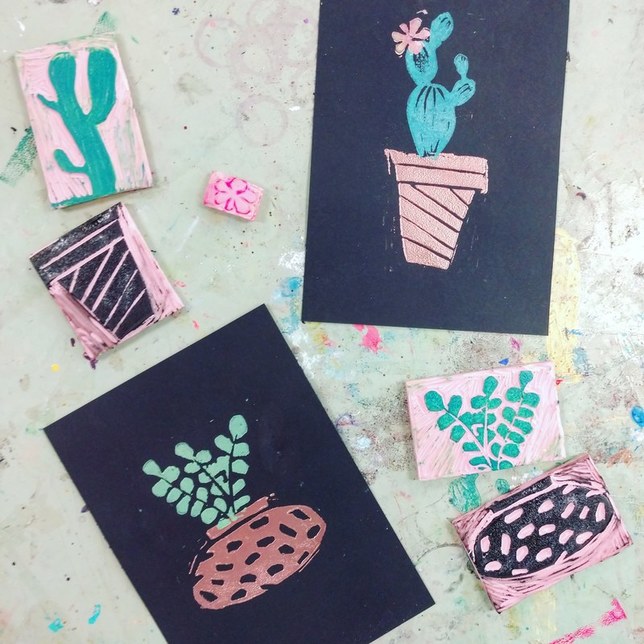
This pink stuff is made by speedball and can be cut to any size. For this project, we used pieces that were about 2.5x3.5". The smaller you go, the harder it is to carve!
I drew our design--three simple pots and three simple cacti--directly onto the rubber using a ball point pen. Then I carefully cut around each using a lino cutters and a small "v" knife. The "v" shape works great for details. I switched to one to the larger "u" shape knifes when I needed to remove the surrounding area. The cutters we use in the studio come with all the little knives we need and the extra knifes store in the handle when not in use! Remember, the areas that you remove will be WHITE (or the color of the paper. Art teachers, this is a great time for a lesson in positive and negative space ;) 
(I didn't take any picture of me carving my cacti, but here's an image of one of our students during printmaking month. See how she keeps her fingers back and out of the path of the blade? Safety first!)

For printing our cacti, we used block printing ink. The real stuff. Yes, you can use paint, but it just doesn't produce the same crisp, clean lines as the sticky ink. You can also use these stamps with just a regular stamp pad (these are our favorite washable ones) but the prints will be a slightly washed-out version of your stamp.
After you spend all that time carving, you going to want the best print possible--and block printing ink is definitely the way to go. We roll our ink out on glass plates (just the inside of some thrift store picture frames) using a brayer until it makes that signature kissy sound. (The kids love that reference). Then, we used the brayer to roll the ink onto our stamp. You can also just press the stamp into the glass plate if you want. However you do it, you want to make sure that your hands stay as clean as possible! 
The pots and succulents are interchangeable and can be mixed and matched. For the green ink, I rolled some with a little but of added yellow and some with an little bit of added blue to give me slightly different shades of green.
I think I like the pots best in the simple black and white. 
But I also had some fun on black paper. The white ink for the pots wasn't quite "WHITE" enough on the black--it read as light grey. While the white ink was still wet, I sprinkled it with cooper embossing powder and used a heat gun to turn it into a raised metallic detail. (That will have to be another blog post though!)
I hope you have fun trying this project out with your students or for some creative time for yourself.

Our favorite printing supplies:
Orange Easel is a participant in the Amazon Services LLC Associates Program, an affiliate advertising program designed to provide a means for sites to earn advertising fees by advertising and linking to Amazon.com
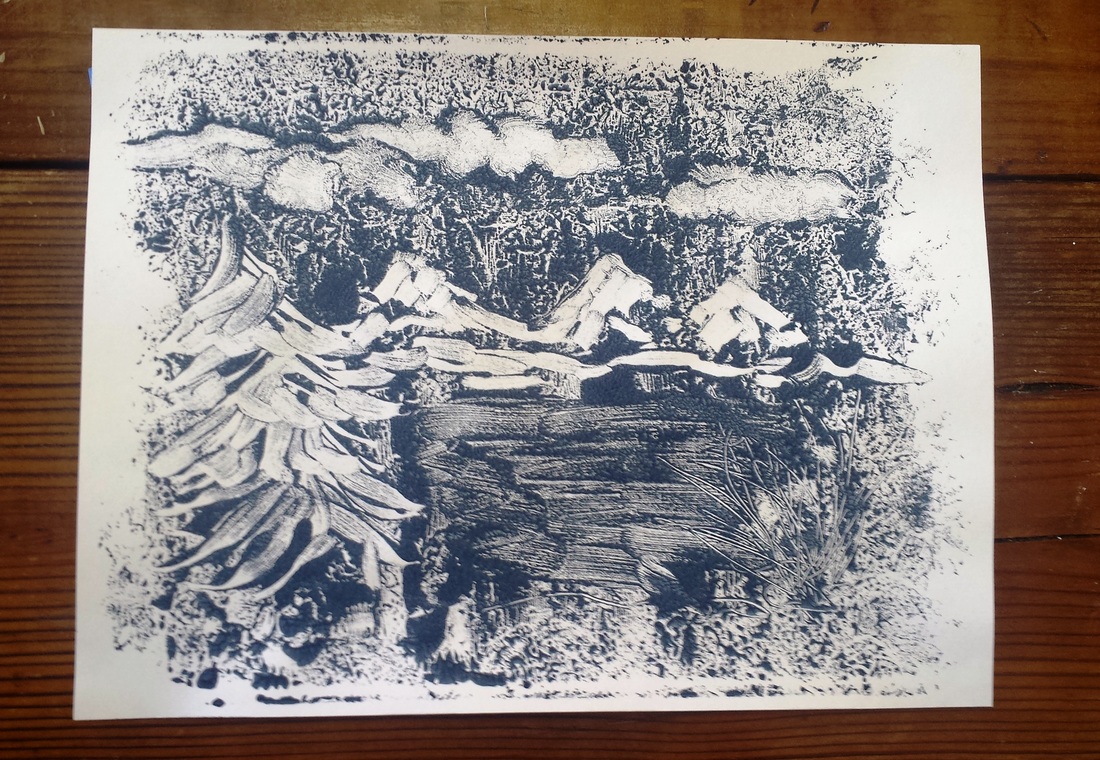
 Every March, our studio turns its attention to the art of printmaking. We explore both BLOCK PRINTING and MONOTYPE PRINTING here in the studio.
This is the second post and video that we've done on monotype prints. You can check out our previous post and video here. Monotyping Tutorial for Home
In our video below, we're using a small piece of glass that we removed from a dollar store picture frame (we used the frames for a weaving project) Other tools were are using:
There's no WRONG way to make prints but we do have some best practices to share with you! We usually encourage our artists to build up lots of layers and use different textures on their prints. Monotypes make wonderful backgrounds and collage papers. They are perfect for just enjoying the PROCESS of making art. Kids love to experiment and just see what happens! Make sure you have a STACK of paper...you're going to need it!
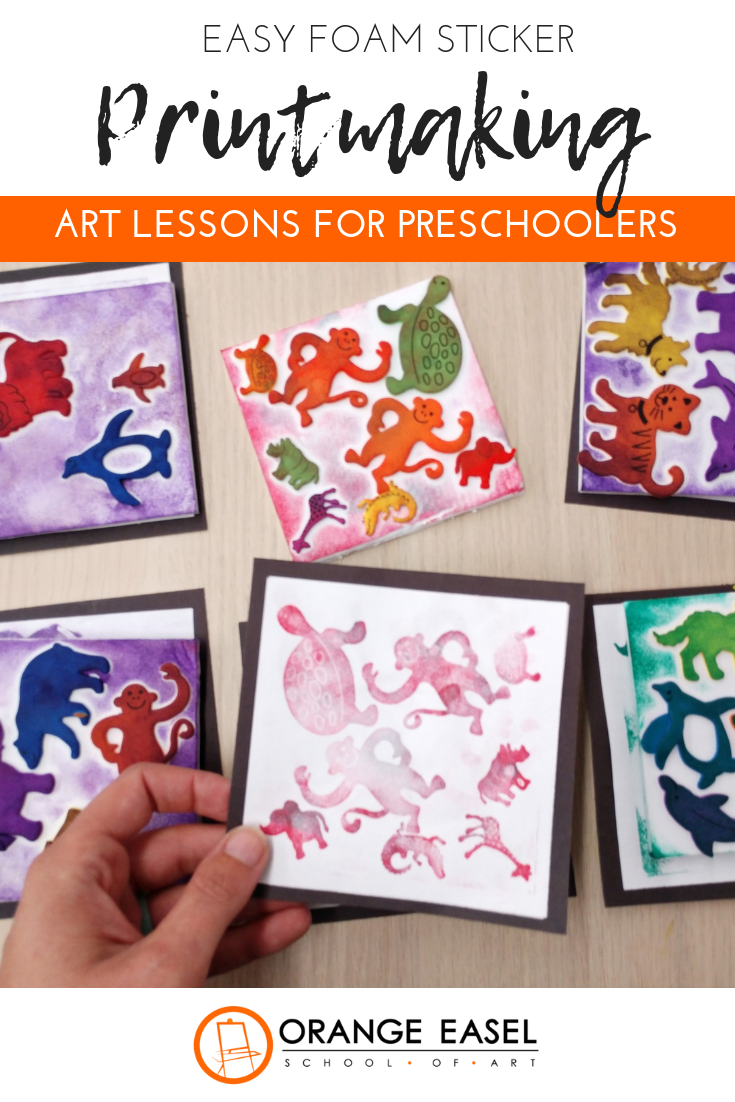
All of our March classes have been exploring PRINTMAKING. Our preschoolers have had MANY opportunities to explore this concept through relief prints, stamping, and mono prints. Check out some of our favorites:
A simple printmaking project that you can try is a monotype (you can only use your template once!). This monotype is made by removing color to create a subtractive image. It challenges us to draw the negative space!
|
Orange EaselContent inspired by the artists and art created in our studio. 
Orange Easel began as a small art studio in my basement and continues to grow and serve our community. Read more about our story here.
Archives
April 2024
Categories
All
|


 RSS Feed
QUICK LINKS
|
|
|
|
LIBERTY STUDIO
249 W Mill St Ste 107 Liberty MO 64068 816-407-9266 |
PLATTE WOODS STUDIO
7617 NW Prairie View Rd Kansas City MO 64157 816-216-7126 |
|
Copyright © 2023 Orange Easel. All rights reserved.
Privacy Policy |
|