

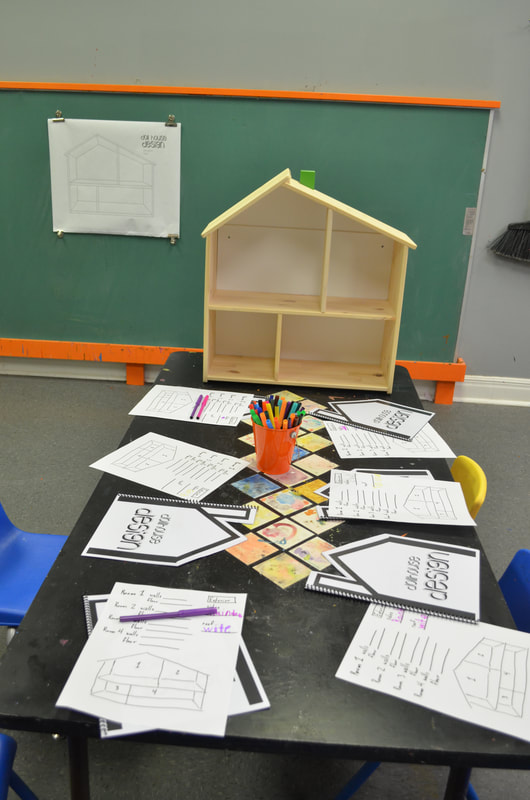
The base for the dollhouse were these wooden dollhouse from Ikea.

Technically, Ikea lists them as shelves, but they work great for a floor toy. They are BIG...standing almost two feet high. They also take a minute to assemble. If you're putting together one dollhouse, no biggie. When you have 20+ that need to be assembled, it's a little more daunting.
Thankfully, we have a great team here: 
We never have any fun.

Our artists started their blank house and a design book. We got our book template from another incredible art studio, Make Art Studio (Heather creates the the most beautiful handouts and downloads). The book helped us to organize our ideas. There's only four rooms so each artist needed to decide on their floor plan.
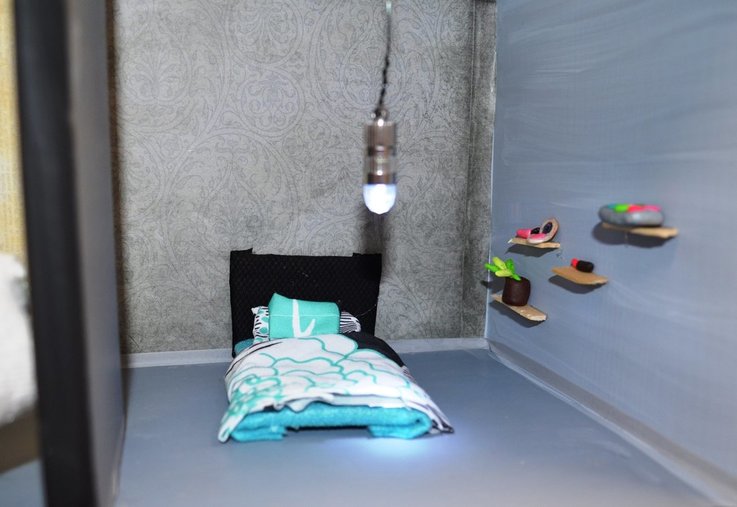
We had a special guest visit the studio on the first day of camp. Toska Tiemann, an interior designer and color expert from Unique Painting, met with our artists to talk about the task ahead of them. They had so many design choices to make...interior and exterior colors, wallpaper or paint, accent walls, flooring, etc.

In addition to designing the walls and floors, our artists also had to create all of the furnishings for inside their houses. The studio's closets were empty this week because every single art material in the studio was sitting out in the large classroom. We used polymer clay, fabric, cardboard, beads, string, mosaic tiles, wire, pom poms, and recyclables. And lots and lots of hot glue.

The results were incredible. I love all the details. We've got pillows. And house plants. And even perfume bottles.


It was an epic week. This is how art camps SHOULD be: A whole week filled independent and passionate creation.
This is a project that could be completed in the home studio to whatever level of intricacy you desire. After you get everything painted, it would be fun to have as an ongoing project--something you continually add new furnishing and details too (just like our real homes!). I hope you enjoyed seeing pictures from our camp in the studio and that you get a chance to try this one out with your kids! 
If you want to see more, we took a live video tour of each of the houses. Our artists explained their choices and their favorite parts.
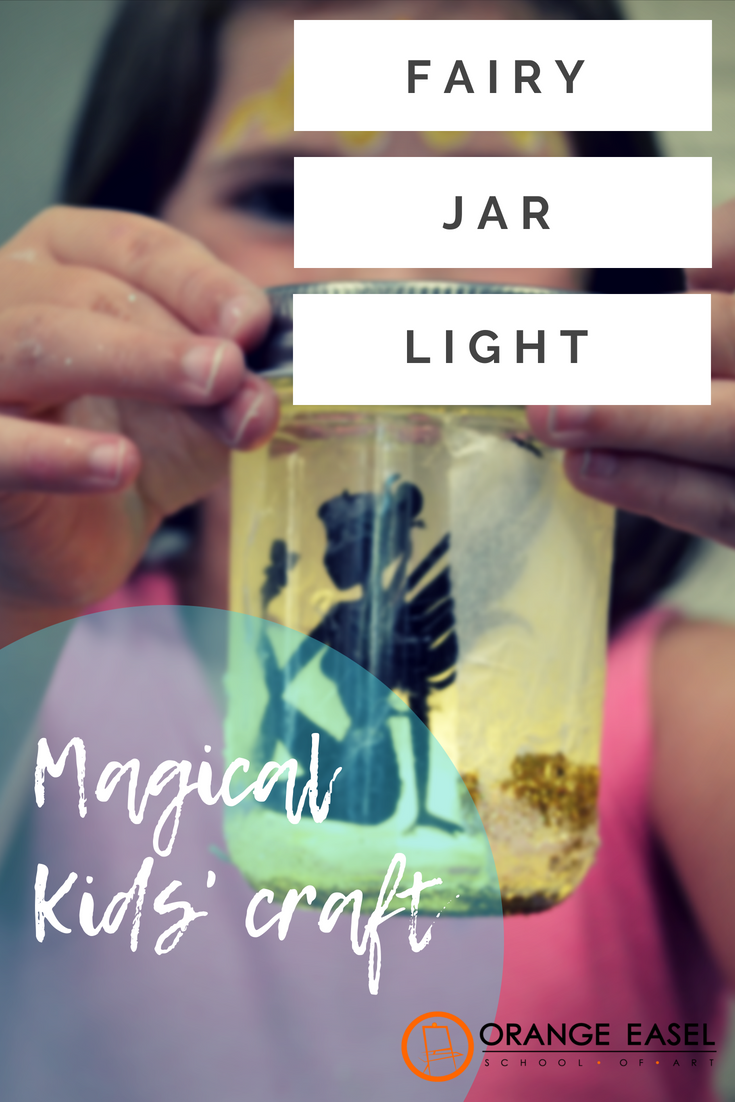
  Fairy Jars Step-by-Step Tutorial
Step 1: Cut out and glue fairy to the inside of the jar (hot glue if cardboard, Mod Podge if paper). If you have the foam sticker fairy, remove backing and press against the inside. You can substitute fairies for dragons, elves, or whatever you like. Step 2: Lightly brush the outside of the jar with modpodge. 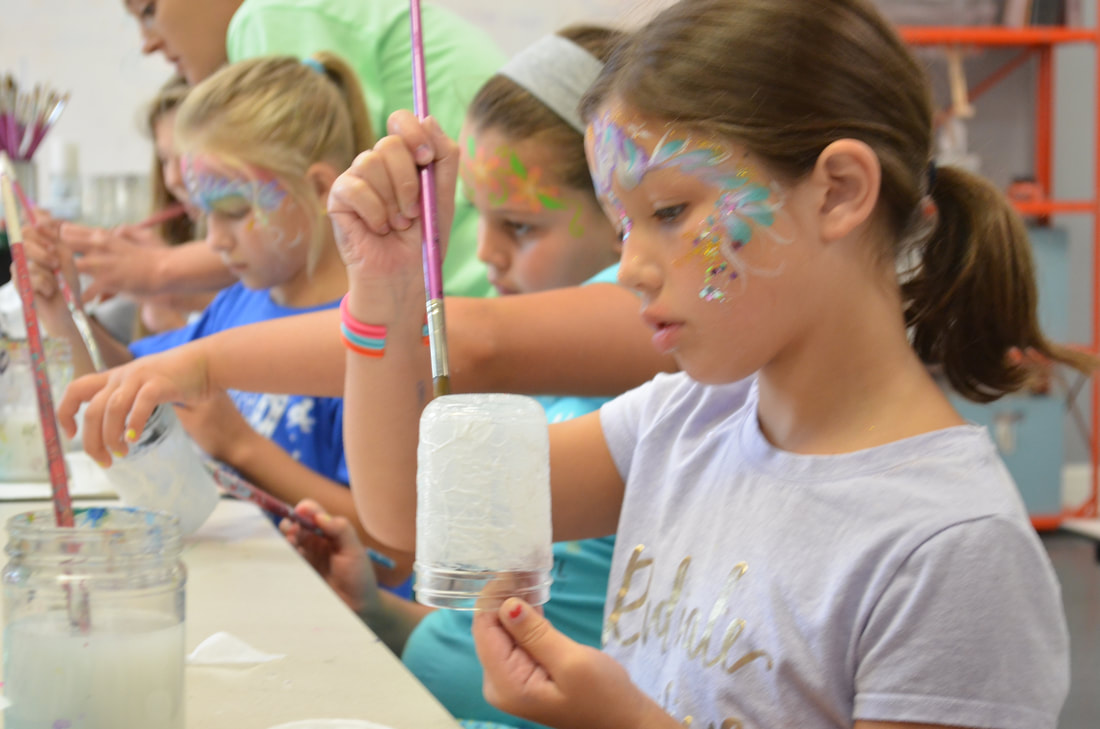 Step 3: Place a single layer of tissue paper over the Mod Podge. Too many layers will make the fairy hard to see, and we're going for a “frosted” glass look. Smooth the tissue paper out with your fingers and coat with modpodge (don't worry, it will dry clear!) 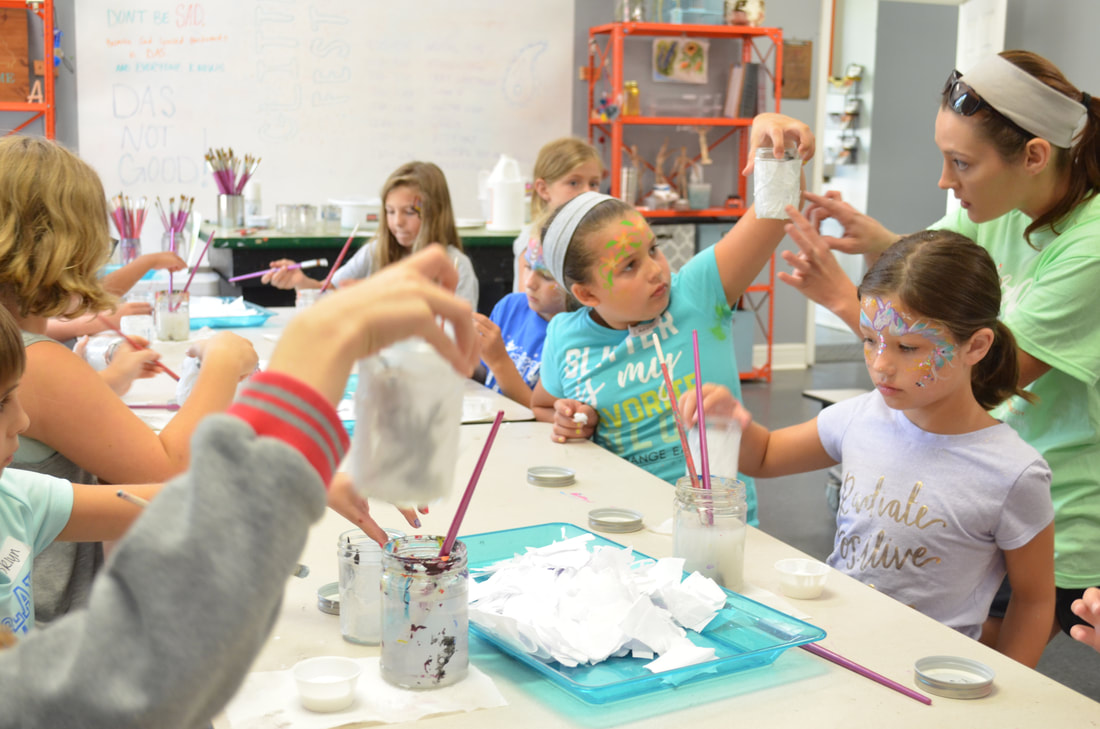 Step 4: While the modpodge is still wet, roll the bottom edge of the jar in iridescent glitter for shimmer. Don't cover the whole jar--glitter isn't as see-through as you think it is! Step 5: Add your battery-powered lights and close lid. Turn off the lights to see the MAGIC!!!  Step 6: You can decorate the jar top with whatever you like (flowers, ribbons, twine, etc.). 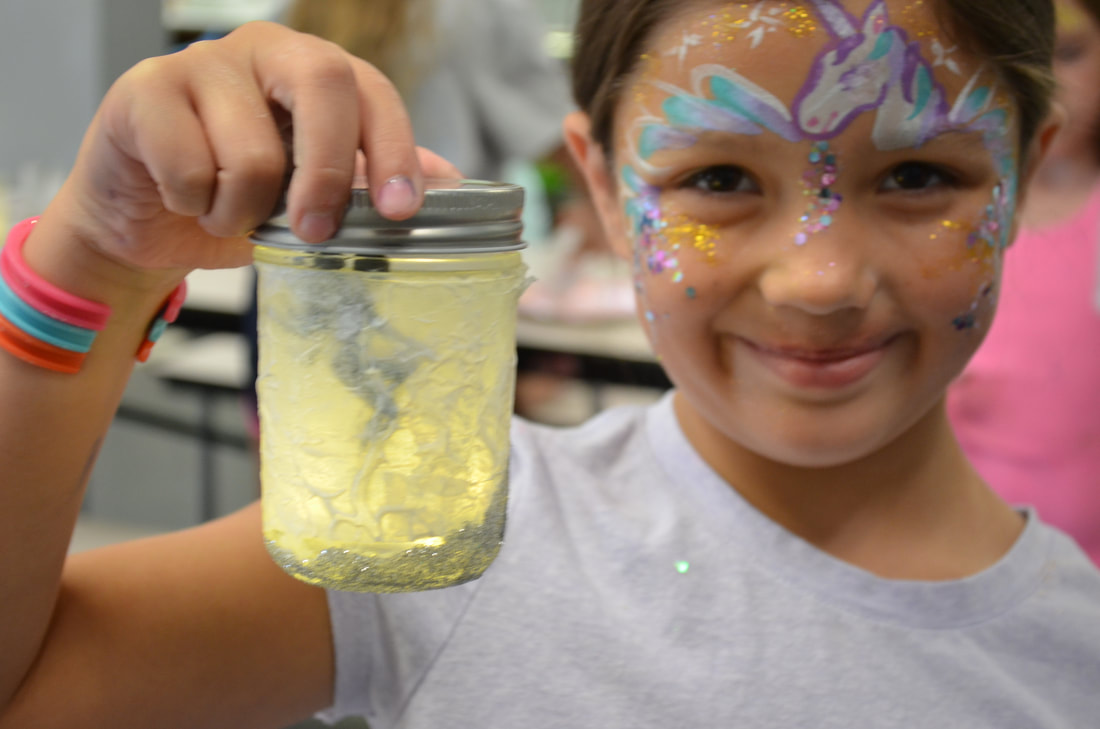 That’s it! Such a simple craft with such a magical result. A fairy light would look great in a bedroom or bathroom as a night light, or as living room décor. They add ambience to any outdoor gathering, or a touch of the mystical to your Halloween decorations. And of course, what fairy garden would be complete without one?! What are you waiting for? Catch a fairy today!  Disclaimer: This post contains affiliate links.
   I love how they are all miss-matched and not perfect spheres. They remind me of little polished pebbles! The project was so popular, we had to do a live tutorial for our community on facebook. We've linked to that below so you can see all our tips and tricks. If you try it out, make sure you post a picture and tag us @orangeeaselart on Facebook, Instagram, or Twitter. We love to see your art!  Video TutorialLet's make some happy-rainbow-swirly-beads together, okay? |
Orange EaselContent inspired by the artists and art created in our studio. 
Orange Easel began as a small art studio in my basement and continues to grow and serve our community. Read more about our story here.
Archives
April 2024
Categories
All
|


 RSS Feed
QUICK LINKS
|
|
|
|
LIBERTY STUDIO
249 W Mill St Ste 107 Liberty MO 64068 816-407-9266 |
PLATTE WOODS STUDIO
7617 NW Prairie View Rd Kansas City MO 64157 816-216-7126 |
|
Copyright © 2023 Orange Easel. All rights reserved.
Privacy Policy |
|