
|
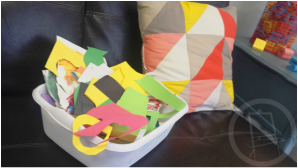
Looking for new ART ideas for Earth Day? These are three of our favorites that focus on REDUCING, REUSING, and RECYCLING materials in a new way! A better Pile of ScrapsLet's start with an easy way to make your scrap pile more appealing. This is not something that needs to be kept up on daily. Just collect those tangle scrap paper in a box and then next time you've got some downtime, trim them into squares and rectangles and add back into your art area. It's a little thing, but take a look below. In our experience, the paper in the box on the right side will be used by young artists while the one on the left stays untouched!
We use a papercutter to make quick work of this project!
|
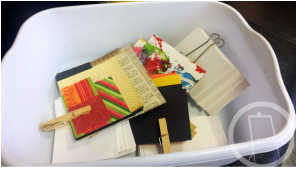
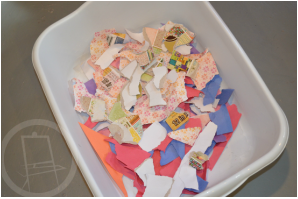 | STEP ONE: Have your artists tear the scraps into small pieces. This is an ART activity. The types and colors of paper that the kids choose will determine the color of the finished piece. Mixing a whole bunch of different colors together will most likely result is a brown-nish colored paper. Place your paper pieces into one of the smaller bins |
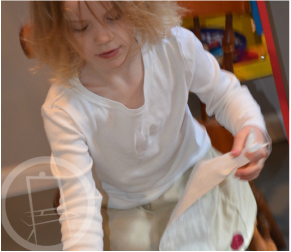 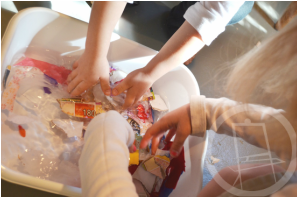 | STEP TWO: Time to add the toilet paper! Which is sure to make the kids giggle. The toilet paper, breaks down and helps bind the pulp together. We tore the toilet paper into small bits too. Tearing is a great fine-motor activity to build those finger muscles! Once the toilet paper was in, we added water to the small tubs. The kids played with it, swished the paper bits around and let them soften up for a minute or two. |
![Paper Making from scrap papers! [ORANGE EASEL School of Art - www.OrangeEaselArt.com]](/uploads/3/5/4/0/35406067/1427909466.png) | STEP THREE: Blend the paper and water mixture into a smooth pulp! The ratio of paper and water isn't important; just make sure that it is able to blend well. |
![Paper Making from scrap papers! [ORANGE EASEL School of Art - www.OrangeEaselArt.com]](/uploads/3/5/4/0/35406067/1427909549.png) | STEP FOUR: Poured the pulp into the big plastic tub and then added enough water to be able to submerge the screen completely. |
![Paper Making from scrap papers! [ORANGE EASEL School of Art - www.OrangeEaselArt.com]](/uploads/3/5/4/0/35406067/1427909603.png) ![Paper Making from scrap papers! [ORANGE EASEL School of Art - www.OrangeEaselArt.com]](/uploads/3/5/4/0/35406067/1427909676.png) ![Paper Making from scrap papers! [ORANGE EASEL School of Art - www.OrangeEaselArt.com]](/uploads/3/5/4/0/35406067/1427909723.png) | STEP FIVE: Submerged the screen to the bottom, and swished the water around to evenly disperse the pulp throughout the tub. Then, very slowly, lift the screen up to the surface. If you do it right, you end up with a thin layer of wet papery pulp that is evenly spread out over the surface of the screen. If you don't do it right...you just try again. |
![Paper Making from scrap papers! [ORANGE EASEL School of Art - www.OrangeEaselArt.com]](/uploads/3/5/4/0/35406067/1427909769.png) | STEP SIX: Dry the pulp on the screen. Let the screen drip over the tub for about 30 seconds or so and then carefully moved it to a nearby towel on the floor. Place a piece of felt on top of the pulp VERY CAREFULLY. Then place another dry towel on top of the felt. This is our press to get all the water out. The kids pressed down on the top towel to squeeze out all the water. When the towels got really wet, we switched then for dry towels to make sure we absorbed all the moisture we could. The more water you can press out of the pulp, the easier the next step. |
![Paper Making from scrap papers! [ORANGE EASEL School of Art - www.OrangeEaselArt.com]](/uploads/3/5/4/0/35406067/1427909807.png) ![Paper Making from scrap papers! [ORANGE EASEL School of Art - www.OrangeEaselArt.com]](/uploads/3/5/4/0/35406067/1427909845.png) | STEP SEVEN: Remove the new paper. This is the trickiest step. The good thing is if you mess up trying to take it off the screen, you can just submerge the whole thing back into the water and start again at Step 4! Uncover the screen/pulp and flipped it upside-down. (The pulp should stick to the screen if you squeezed all the water out.) With the felt underneath and the screen upside-down, use your fingers to gently push and loosen the pulp around the perimeter of the screen. Gravity should do most of the work. Allow the wet, fragile paper to "fall" onto the felt. |
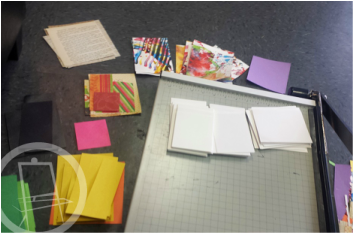
Then what? Depending on the thickness of the paper, it will take a day or two to dry fully. You can let it dry on the felt. Once dry, you can just enjoy it for the art that it is OR you can use it for another project.
Here are some ideas for your handmade paper:
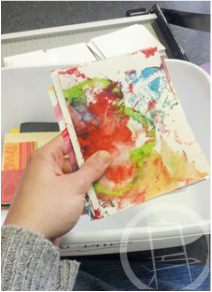
1. Paint on it (watercolor would be really pretty)
2. Cut shapes from it and use them to embellish cards or scrapbook pages
3. Use as gift tags
4. Make ornaments, garland, or buntings
5. Cut into strips and use as napkin rings for a special dinner
6. Make a collage
7. Wrap a small present
8. Trace your childs hand and cut it out
9. Cut into strips and use it for paperweaving
Here are some ideas for your handmade paper:
1. Paint on it (watercolor would be really pretty)
2. Cut shapes from it and use them to embellish cards or scrapbook pages
3. Use as gift tags
4. Make ornaments, garland, or buntings
5. Cut into strips and use as napkin rings for a special dinner
6. Make a collage
7. Wrap a small present
8. Trace your childs hand and cut it out
9. Cut into strips and use it for paperweaving
WEIRD collageS
Another Earth Day project -- Use your pile of magazines, junk mail, and paper scraps to make a surrealism collage. Surrealism a 20th-century avant-garde movement that is known for it's irrational juxtaposition of images.
![3 Earth Day Art Ideas - Reduce, Reuse, and Recycle [ORANGE EASEL School of Art - www.OrangeEaselArt.com]](/uploads/3/5/4/0/35406067/1429806_orig.jpg) La Perstencia de la Memoria, by Salvador Dali | ![3 Earth Day Art Ideas - Reduce, Reuse, and Recycle [ORANGE EASEL School of Art - www.OrangeEaselArt.com]](/uploads/3/5/4/0/35406067/3463361.jpg?265) The False Mirror, by Rene Magritte |
Use the images from other sources to come up with your own weird picture! When we teach this in the studio, we usually have the artists do all the cutting FIRST. After they have a nice pile of funny images, we find a background image to use and then begin adding the pieces.
Here's a collage from one of our classes:
Here's a collage from one of our classes:
![3 Earth Day Art Ideas - Reduce, Reuse, and Recycle [ORANGE EASEL School of Art - www.OrangeEaselArt.com]](/uploads/3/5/4/0/35406067/1428422798.png)
Local to KC? Join us on May 2nd at our Open Art session to try your hand at Surrealism Collages!
0 Comments
Your comment will be posted after it is approved.
Leave a Reply.
Orange Easel
Content inspired by the artists and art created in our studio.
Orange Easel began as a small art studio in my basement and continues to grow and serve our community. Read more about our story here.
Archives
April 2024
June 2023
April 2021
April 2020
July 2019
June 2019
April 2019
March 2019
February 2019
January 2019
December 2018
November 2018
October 2018
September 2018
August 2018
July 2018
June 2018
May 2018
April 2018
March 2018
February 2018
January 2018
November 2017
October 2017
August 2017
June 2017
May 2017
April 2017
March 2017
January 2017
May 2016
March 2016
February 2016
January 2016
November 2015
October 2015
September 2015
August 2015
July 2015
June 2015
May 2015
April 2015
March 2015
January 2015
December 2014
November 2014
October 2014
September 2014
August 2014
May 2014
Categories
All
2014 2015 Curriculum
2014-2015 Curriculum
2015 16 Curriculum
Art History
Art Projects
At Home Ideas
Charcoal
Child Development
Christmas
Color Mixing
Drawing
Event Photos
Halloween
Ink
Kansas City Love
Kindergarters
Metal Arts
Middle School
Miss Allison's Art
Mixed Media
New Years
Orange Easel
Paint
Painting
Parenting
Preschool
Preschool Art
Preschool Playtime
Printables
Printmaking
Recipes
School
Sculpture
Sensory
Slime
Special Needs
Springtime Art
Storytime Art
Student Art Gallery
Summer Classes
Tips
Toddler Art
Tutorial
Tutorials
Valentine's Day
Videos
Yarn
 RSS Feed
QUICK LINKS
|
|
|
|
LIBERTY STUDIO
249 W Mill St Ste 107 Liberty MO 64068 816-407-9266 |
PLATTE WOODS STUDIO
7617 NW Prairie View Rd Kansas City MO 64157 816-216-7126 |
|
Copyright © 2023 Orange Easel. All rights reserved.
Privacy Policy |
|