
  Fairy Jars Step-by-Step Tutorial
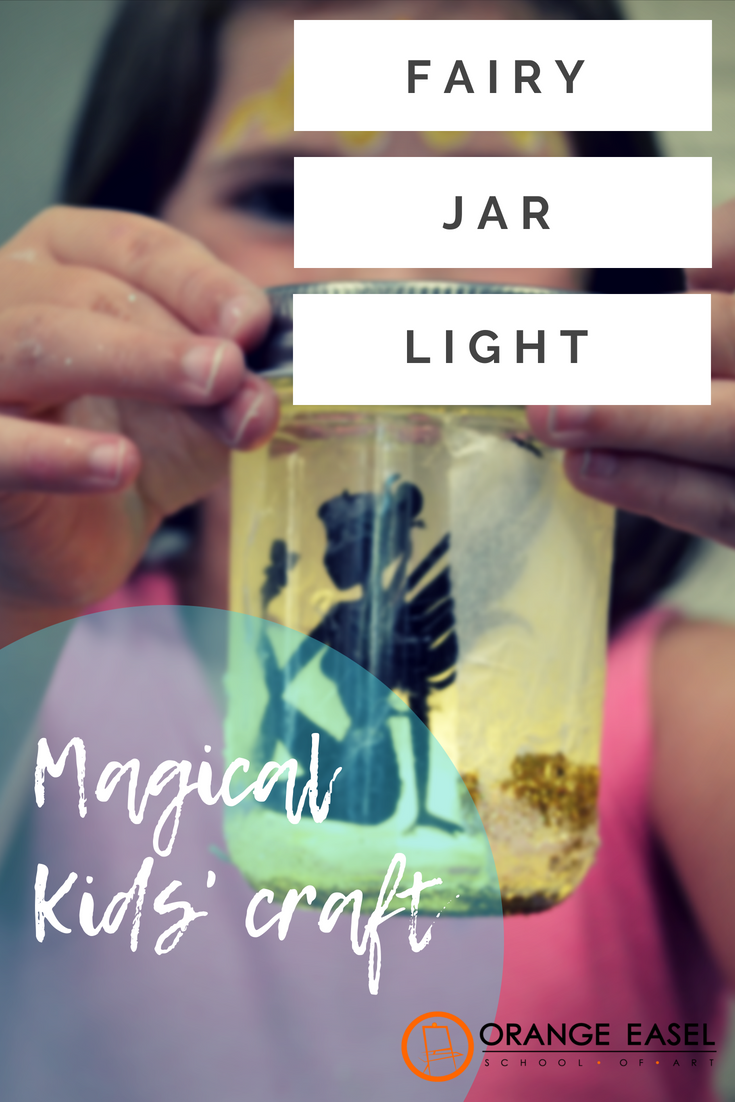
Step 1: Cut out and glue fairy to the inside of the jar (hot glue if cardboard, Mod Podge if paper). If you have the foam sticker fairy, remove backing and press against the inside. You can substitute fairies for dragons, elves, or whatever you like. Step 2: Lightly brush the outside of the jar with modpodge. 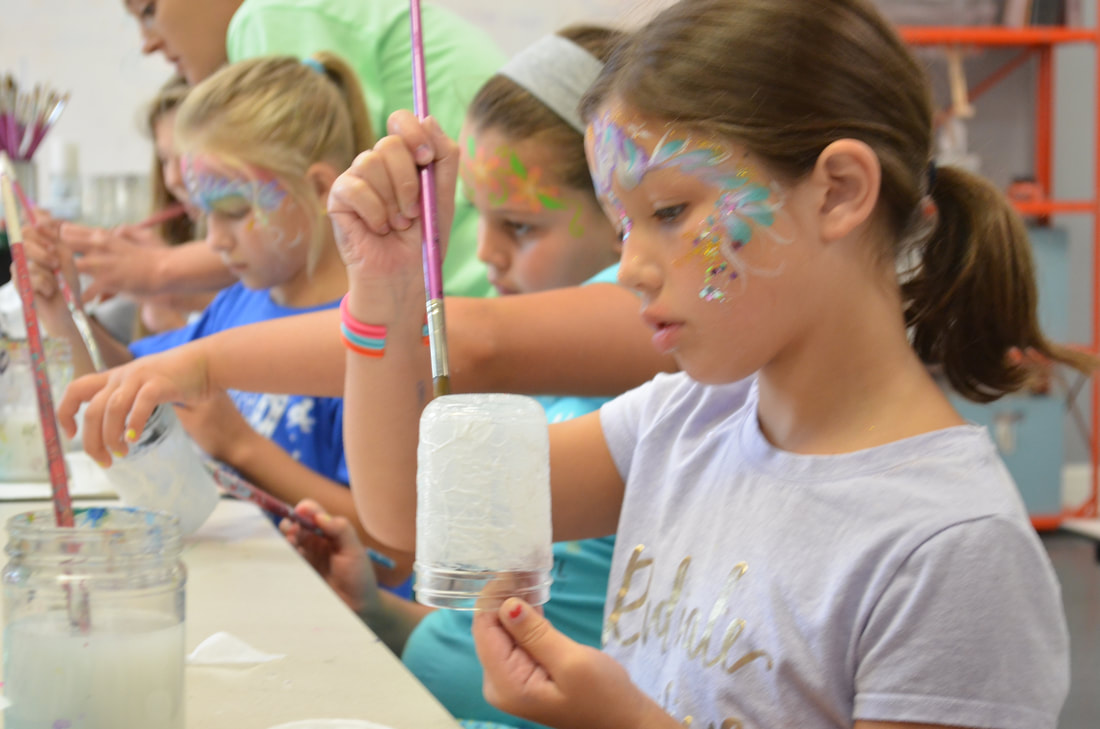 Step 3: Place a single layer of tissue paper over the Mod Podge. Too many layers will make the fairy hard to see, and we're going for a “frosted” glass look. Smooth the tissue paper out with your fingers and coat with modpodge (don't worry, it will dry clear!) 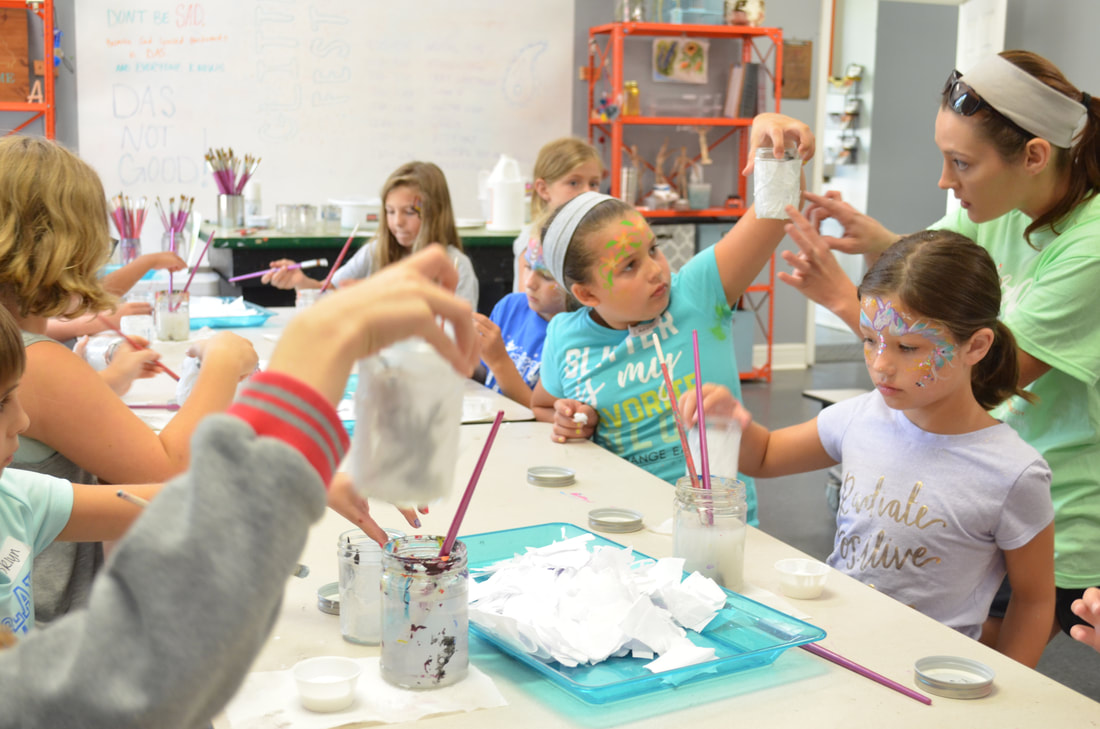 Step 4: While the modpodge is still wet, roll the bottom edge of the jar in iridescent glitter for shimmer. Don't cover the whole jar--glitter isn't as see-through as you think it is! Step 5: Add your battery-powered lights and close lid. Turn off the lights to see the MAGIC!!!  Step 6: You can decorate the jar top with whatever you like (flowers, ribbons, twine, etc.). 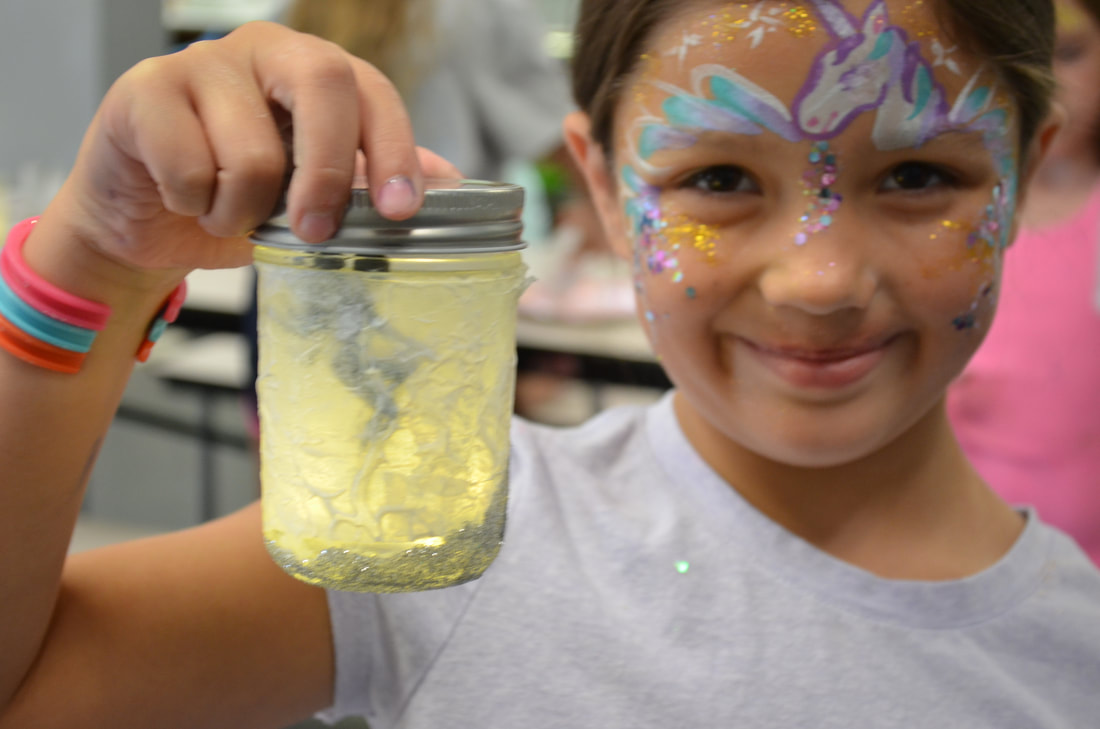 That’s it! Such a simple craft with such a magical result. A fairy light would look great in a bedroom or bathroom as a night light, or as living room décor. They add ambience to any outdoor gathering, or a touch of the mystical to your Halloween decorations. And of course, what fairy garden would be complete without one?! What are you waiting for? Catch a fairy today!  Comments are closed.
|
Orange EaselContent inspired by the artists and art created in our studio. 
Orange Easel began as a small art studio in my basement and continues to grow and serve our community. Read more about our story here.
Archives
April 2024
Categories
All
|

 RSS Feed
QUICK LINKS
|
|
|
|
LIBERTY STUDIO
249 W Mill St Ste 107 Liberty MO 64068 816-407-9266 |
PLATTE WOODS STUDIO
7617 NW Prairie View Rd Kansas City MO 64157 816-216-7126 |
|
Copyright © 2023 Orange Easel. All rights reserved.
Privacy Policy |
|