
Art History Matters
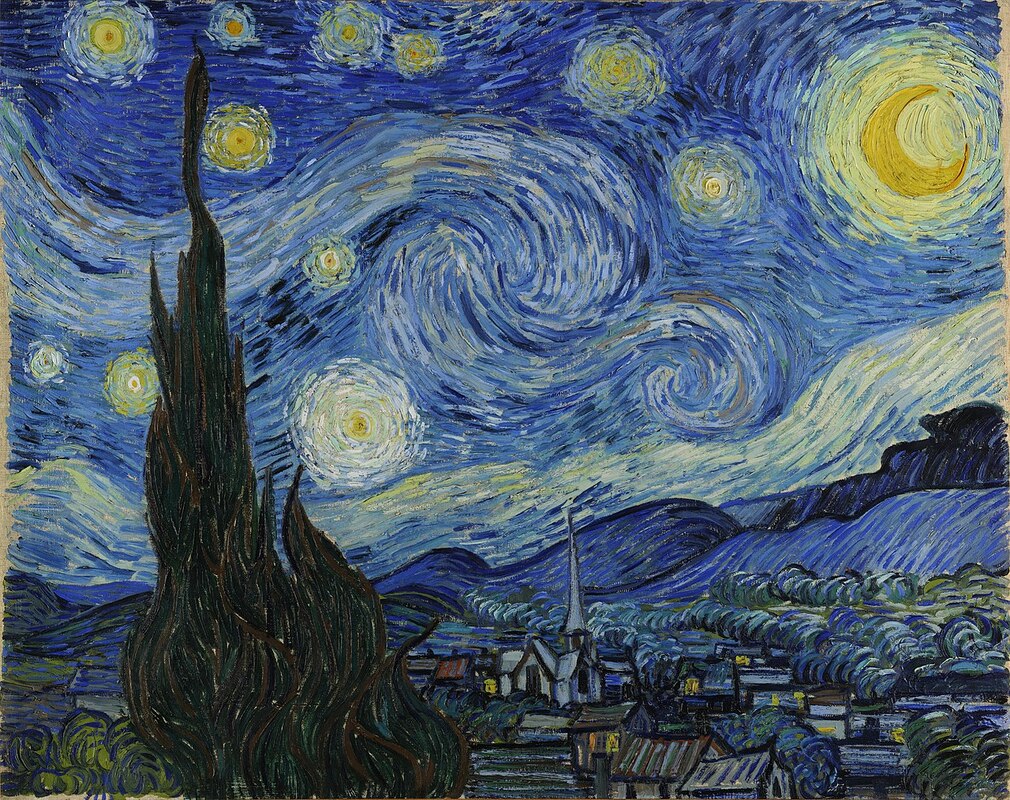
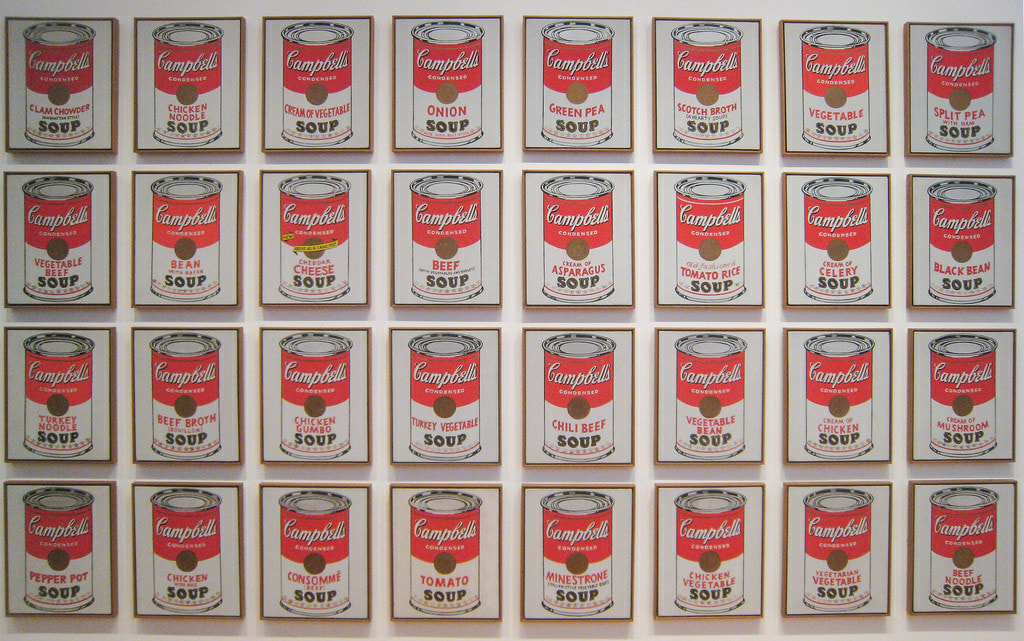
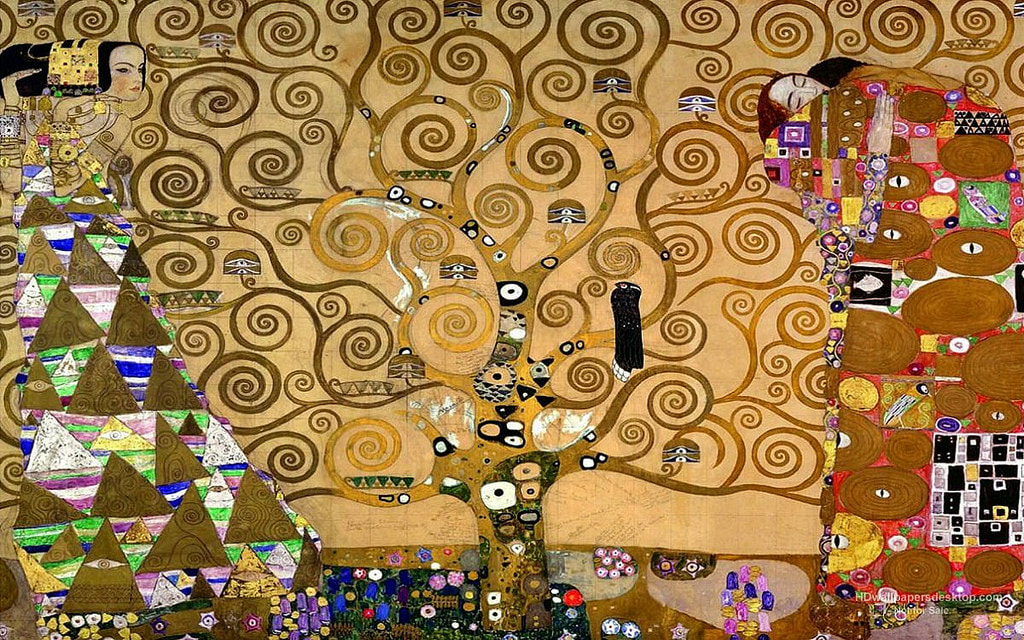
Our preschool classes have a monthly Art History focus that goes along with the art concept that we're learning and the stories that we're reading. When we're studying CONTRAST (the difference between black and white, shadow and highlight)d in January, we look at VanGogh's Starry Night and we read the books Flashlight and Where the Wild Things Are. We don't look at VanGogh's Sunflowers because they don't fit into our curriculum. Don't feel like you have to teach the entire breadth of an artists' work or the entire art movement; it's okay to simplify it.
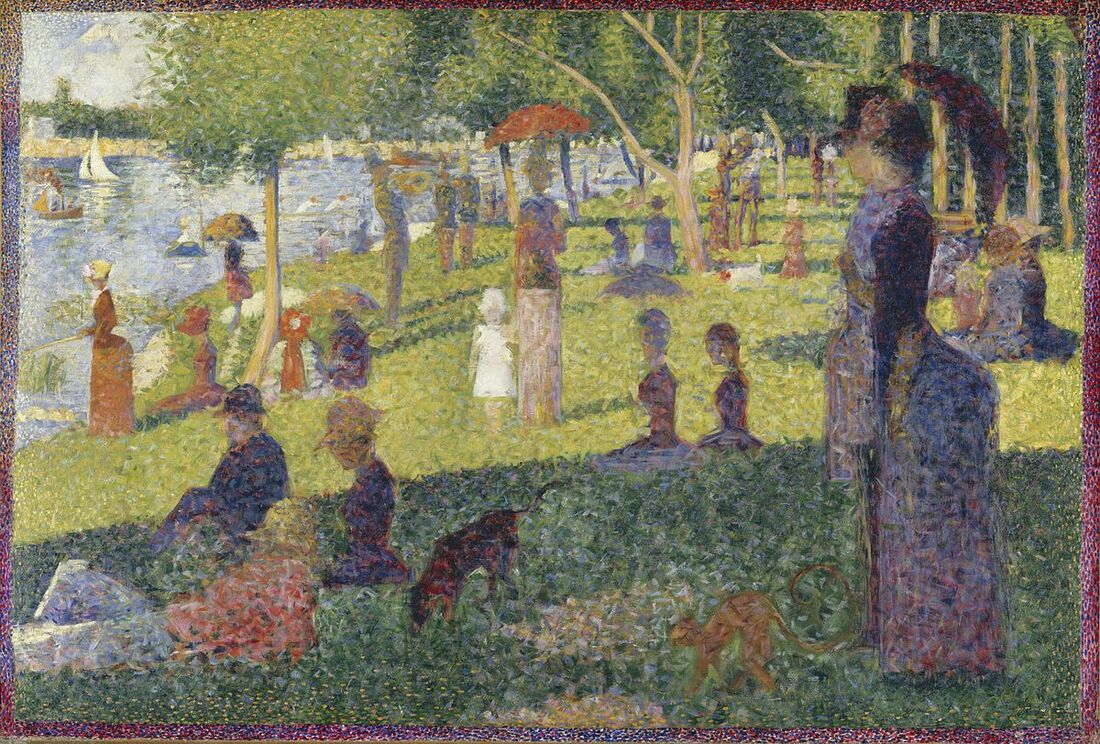
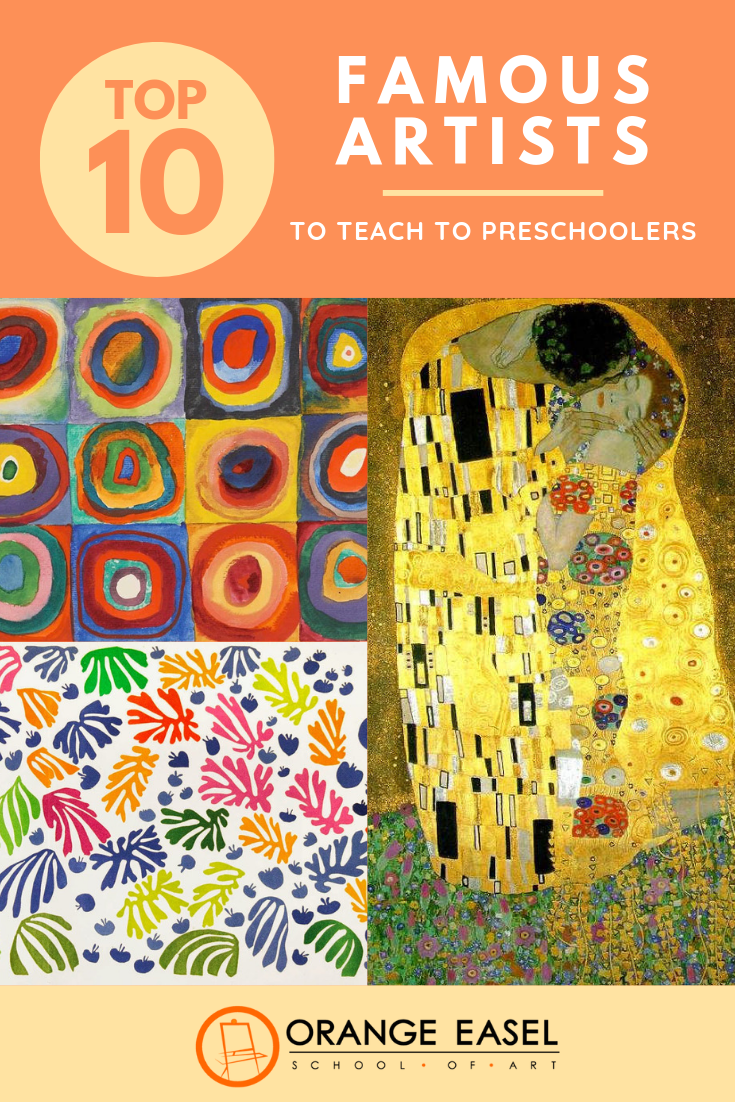
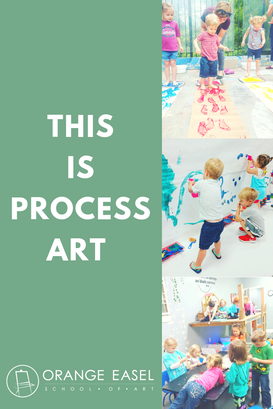
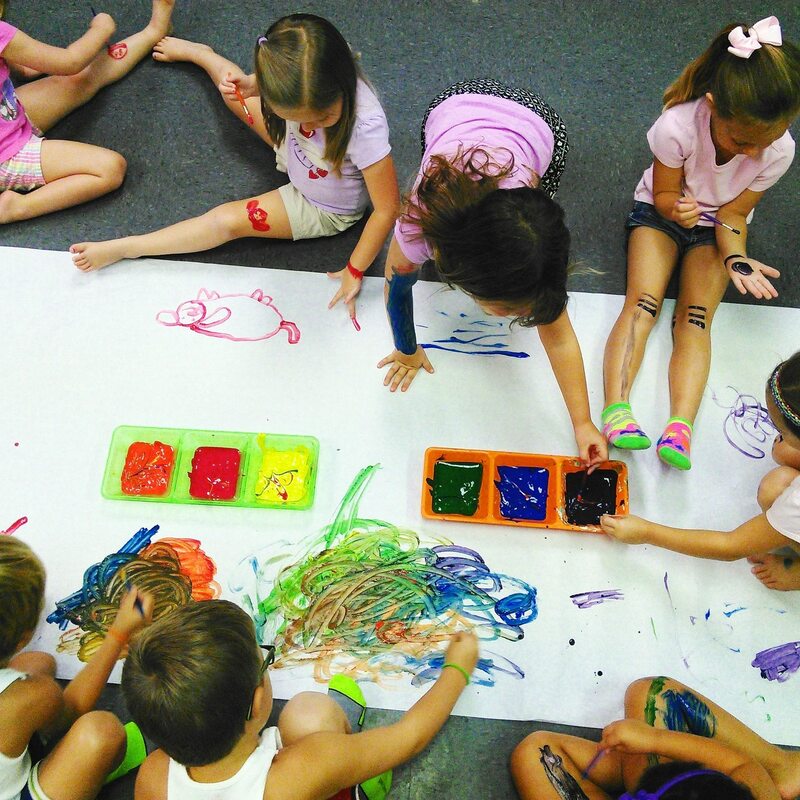
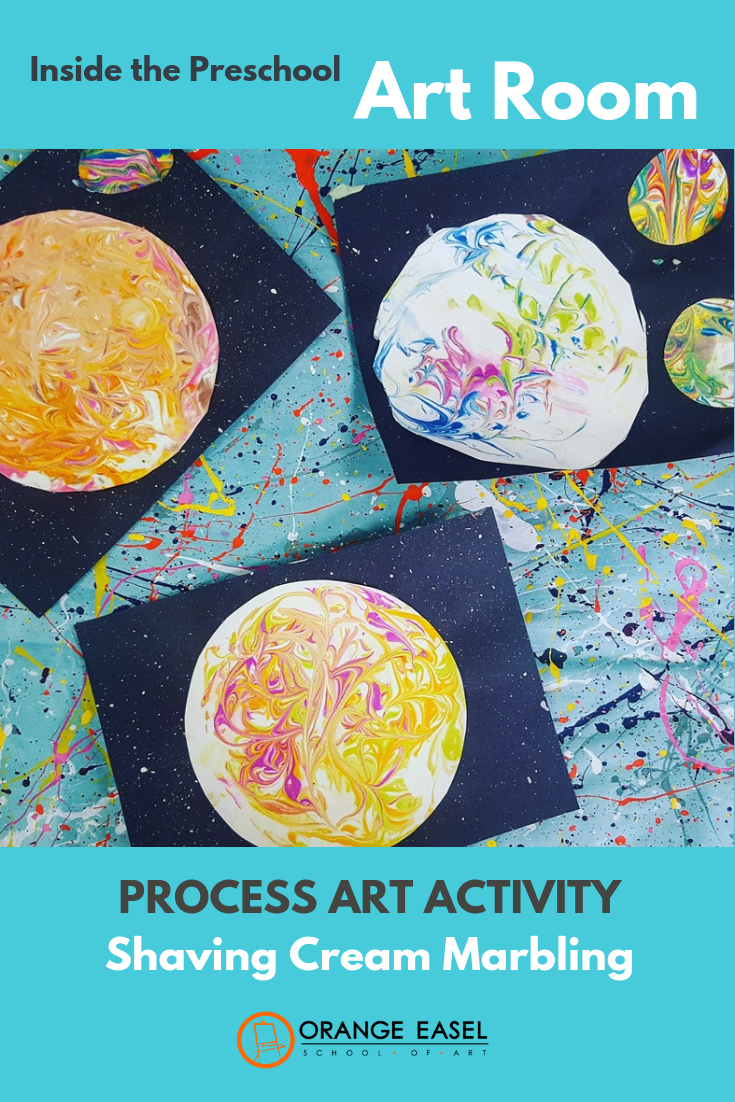
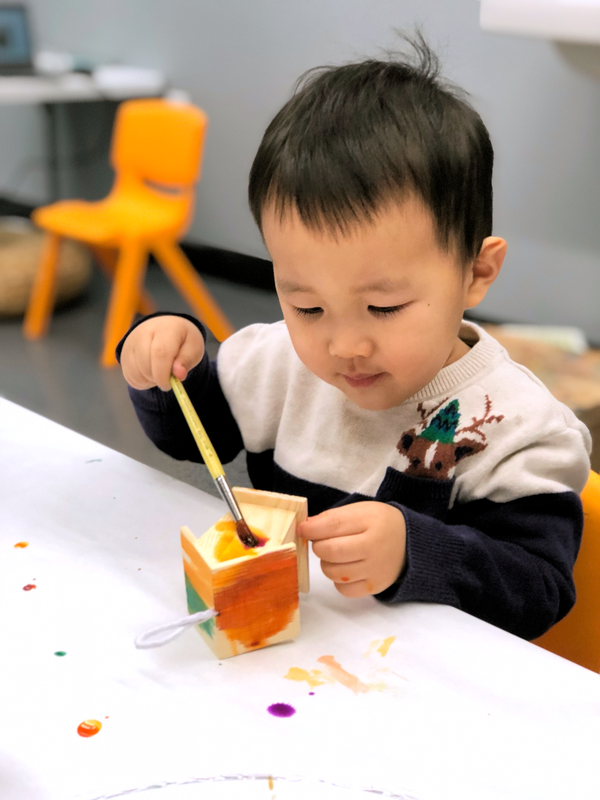
It's also important to note that our lessons and our activities that follow are PROCESS ART. It's never about the product that is created, but rather the learning that took place in the process. When we're learning about Seurat and then offer an invitation to try pointillism by making fingerprints on giant stamp pads, it's perfectly acceptable for our artists to make handprints instead. Or even foot prints. Our art invitations are just that--invitations. It doesn't mean that the lesson was a failure or that they don't understand Seurat's art. Maybe our artists just really, really needed to feel their whole hand on that stamp pad. Our Top 10 Favorite Famous Artists to Teach Kids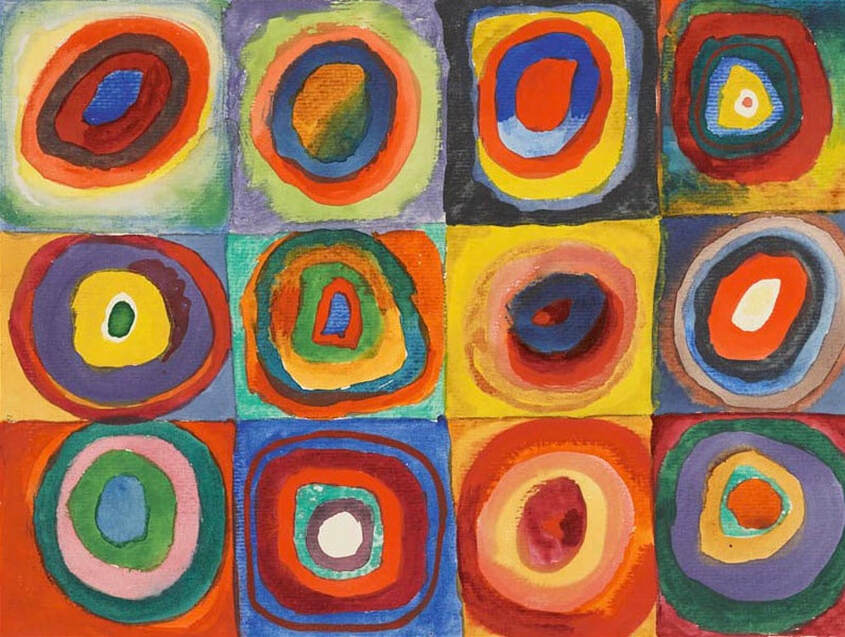


Additional Preschool Resources
We hope that our Top 10 gets you thinking about YOUR Top 10 list. And inspires you to incorporate some art history into you ABCs, colors, and shapes lesson. There are so many tie-ins between famous artists and famous paintings that you can use in the preschool classroom. Happy teaching!

Process Art is not about us. It's about them.
TIP #1: Set the expections up front
At the beginning on the year, send home a flyer about the types of activities you'll be doing in your room and WHY. If you need a template to get you started, I've got you. Click here to download a one-page document that you can personalize for your class.
TIP #2: Take pictures
Capturing the actual creation will help parents to visualize what exactly happened. Video is even better. See how focused they are? See how they are smiling?
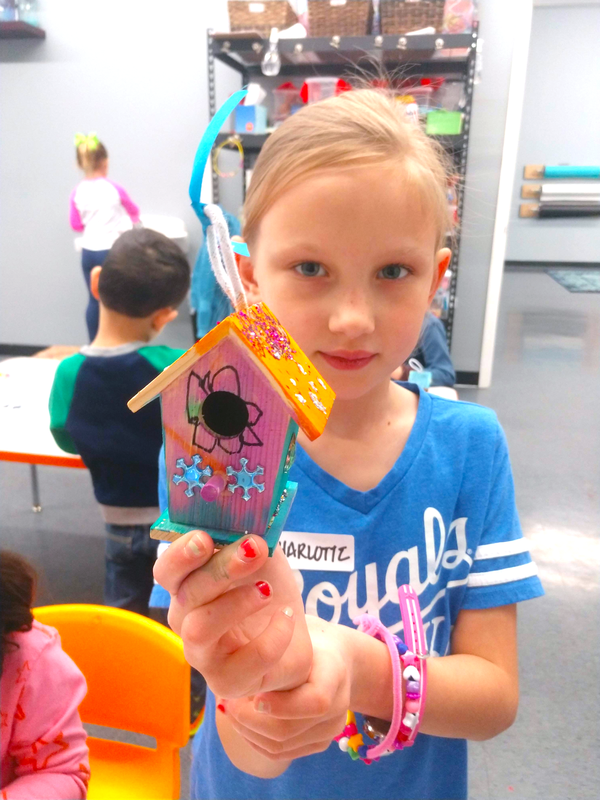
TIP #3: Stop sending the art home
Stop worrying about HAVING something to send home. It's okay if they don't take something home. If the process is what really matters, the product created isn't needed as proof. Don't feel like you need to keep everything. Often times in our art centers, those small quarter sheets of paper get used and left there, with no name or way of knowing who it belongs to. We usually pile them all up and save them until the end of the day JUST IN CASE someone comes back for it. If not, it get's thrown away. If the kids don't care, why should you?
TIP #4: Make collaborative art instead
Giant collaborative art is wonderful for the classroom because it's easier to prepare, uses fewer resources, and encourages communication skills between students. Plus, when the art stays in the classroom, it can be revisited over and over (and none of the parents have to figure out what to do with the day's art.)
TIP #5: Document what the children say about their art
Write a note quoting the child's explanation of their art. Drawing for preschoolers is more about communication than it is about making something pretty. This way parents can continue the conversation at home.
I hope that those tips are helpful. What's your best tip for advocating for more PROCESS ART in the preschool classroom? I'd love to know!

FIND US ON SOCIAL MEDIA
More Process Art for Preschoolers
This post contains affiliate links.
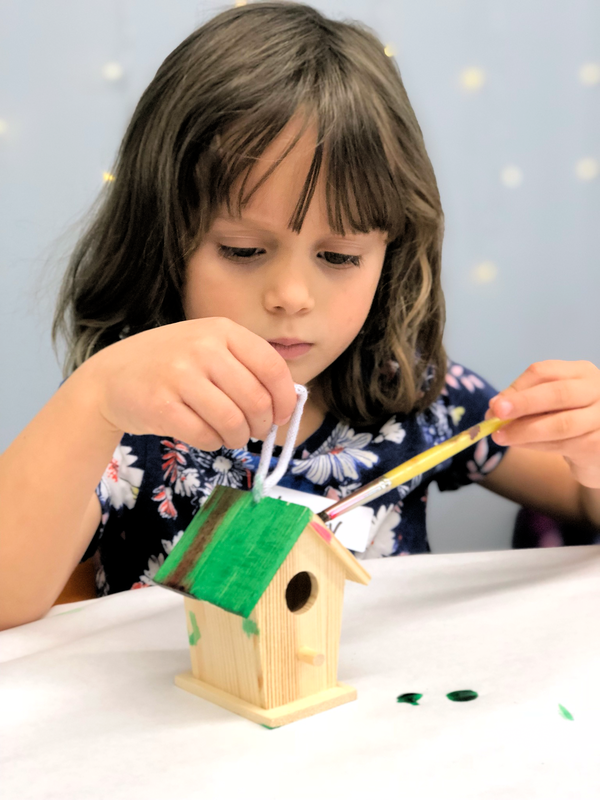
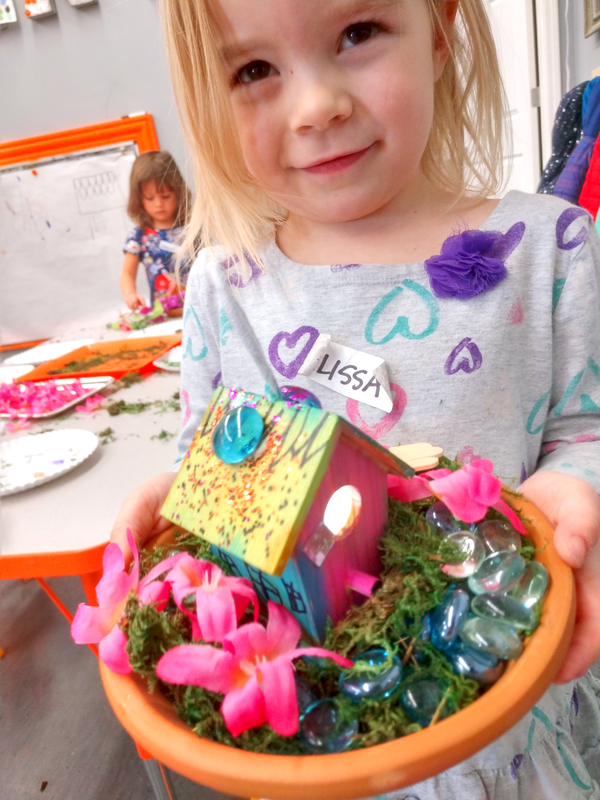
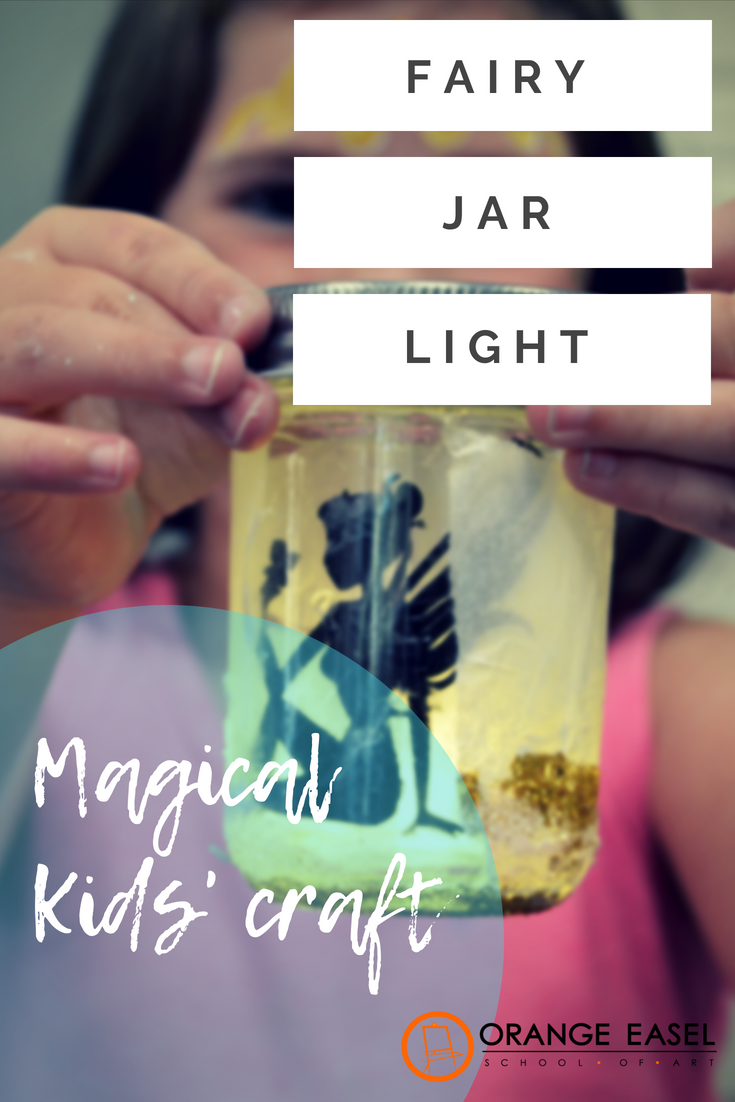
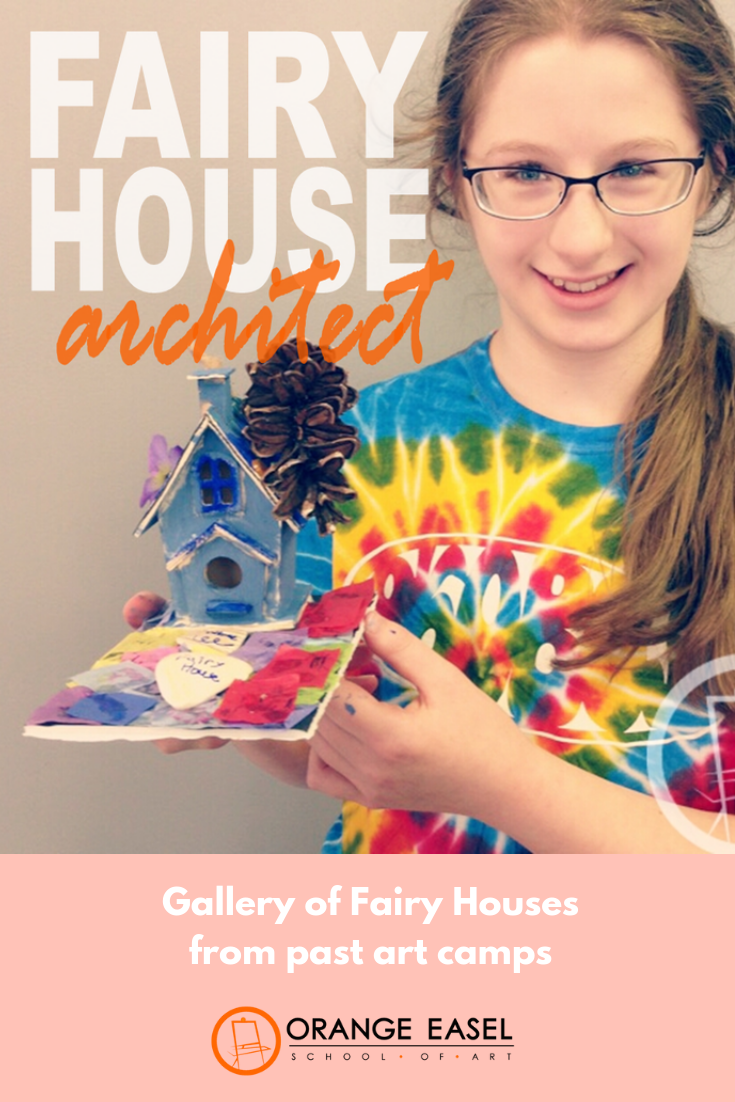
Host Your Own Fairy CampStep One: We begin with a look at architecture. We look at photos of different houses and discuss what we see. We talk about windows and window frames. Types of siding. Types of roofs (rooves?). We notice trim. And gutters. And eaves. Only after we've OBSERVED the world around us, we can begin to create. 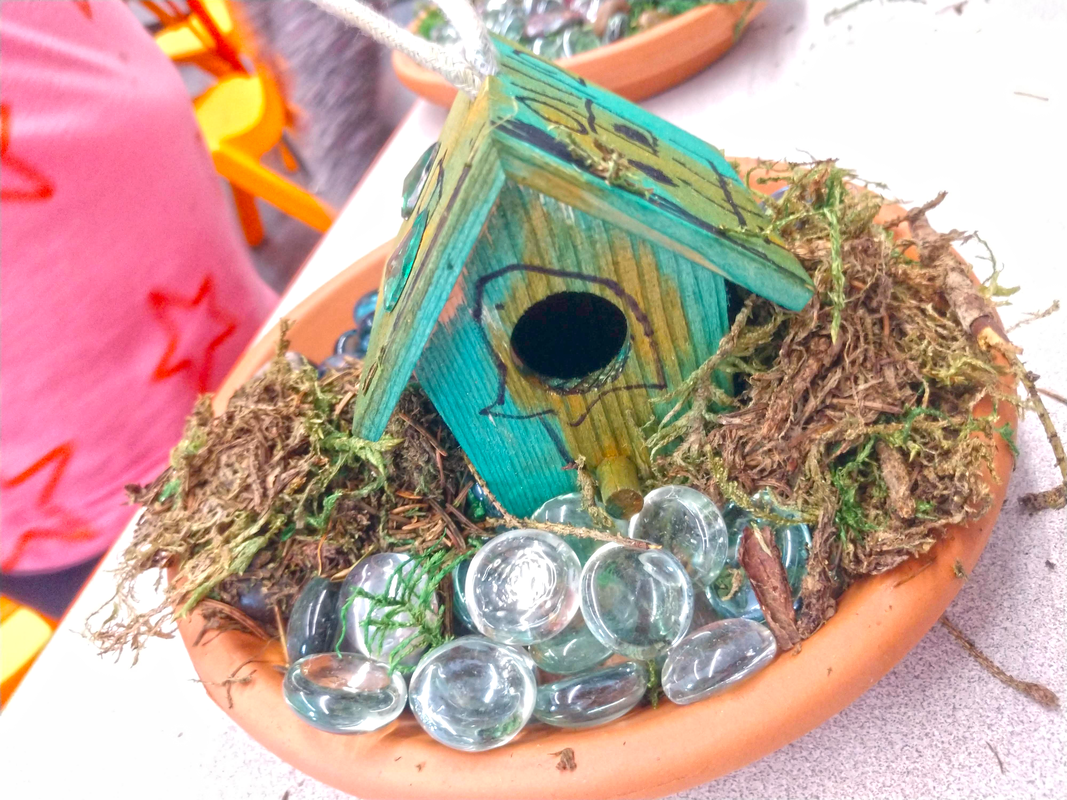 Step Two: We use these little wooden birdhouses. They come in different sizes and I feel like over the past six years, we've used them all! Most recently, we used these ones. They are only about 1.5 inches high and are perfect for fairies! Plus, they fit really nicely on our saucers and leave plenty of "yard." Our artists use sharpie markers to add architectural details onto their fairy house. If we have a particularly young crowd, we usually discuss the difference between DRAWING and COLORING before we had out the sharpies. We're going to be painting these with watercolors, so DRAWING is all we need here. Not coloring.
Step Three: Our favorite paints are liquid watercolors. And our favorite liquid watercolor for this is Colorations GLITTER Liquid Watercolor. Because it's washable. And it has glitter. Duh. The liquid watercolor is perfect to stain the wood a beautiful, sparkling, rainbow of color while still allowing for all the sharpie details to show through. Bonus: it drys really quickly.
Step Four: Once the houses are dry, we invite the artists to glue even more details onto their wooden houses. These details could really be anything you have laying around the craft closet, but OUR favorites are sequins, faux flowers, and gemstones. You could use regular glue or modpodge for this, but hot glue is the real winner. (Yes, we let our 4-5's use low temp hot glue guns. It's something we're pretty proud of. But that's another blog post for another time.) The video below show our artists hard at work on this step. We also offered glue and glitter shakers at this camp. :) Step Five: Our artists create gardens for their houses using a terra cotta plant saucer. The gardens are made from moss, glass gems, and faux flowers. Some of our older artists use popiscle sticks to construct bridges and fences. If we have an older crowd it's fun to just put out a variety of supplies to see what they can come up with. Things like twine, ribbons, cardboard, washers, buttons, thread spools, sea shells, and toothpicks make for wonderful tinkering materials. Again hot glue is your friend. In longer classes, we've even put out the polymer clay so kids can sculpt miniature forrest animals and tiny home funishings. 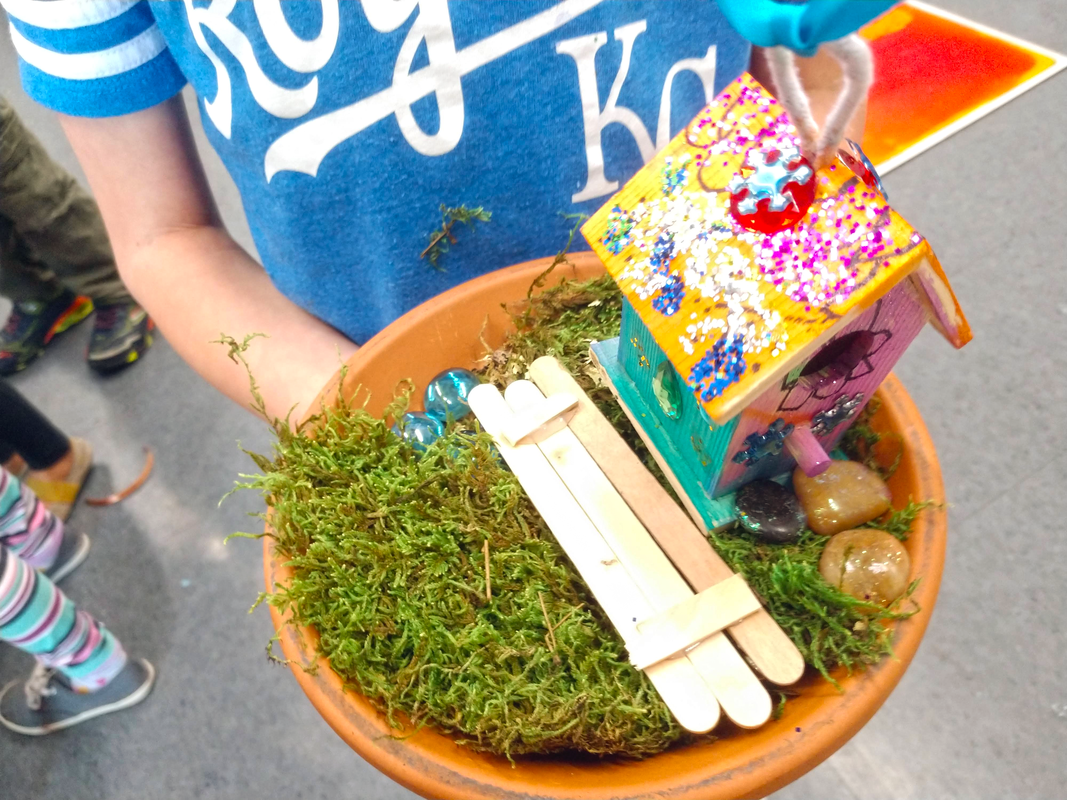 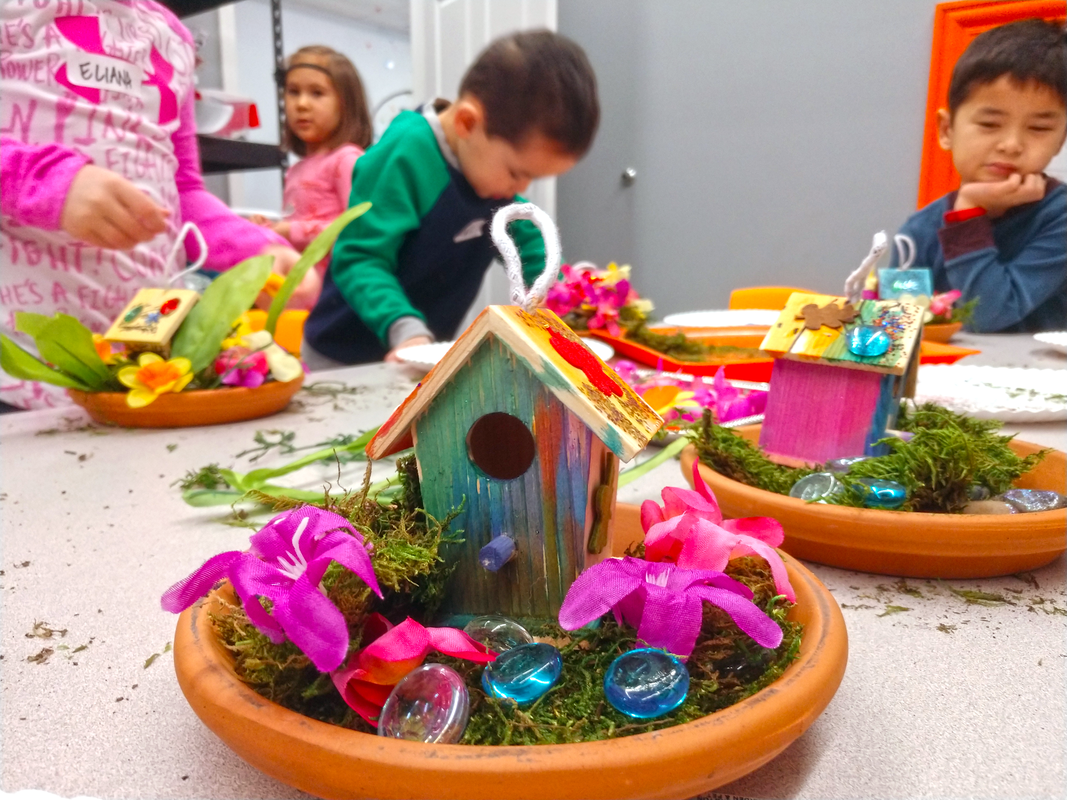 Step Six: Once the garden is done, we add the houses and the fairies. Our "fairies" are battery-powered led lights. They are the perfect size for placing inside the tiny houses. (Tip: Tie a string to little loop on the light if you want to be able to get it back out of your house easily to turn it off.) Enjoy this video of Miss Sara introducing our artists to the fairy: When the fairies are inside the houses, they make a perfect little night light! 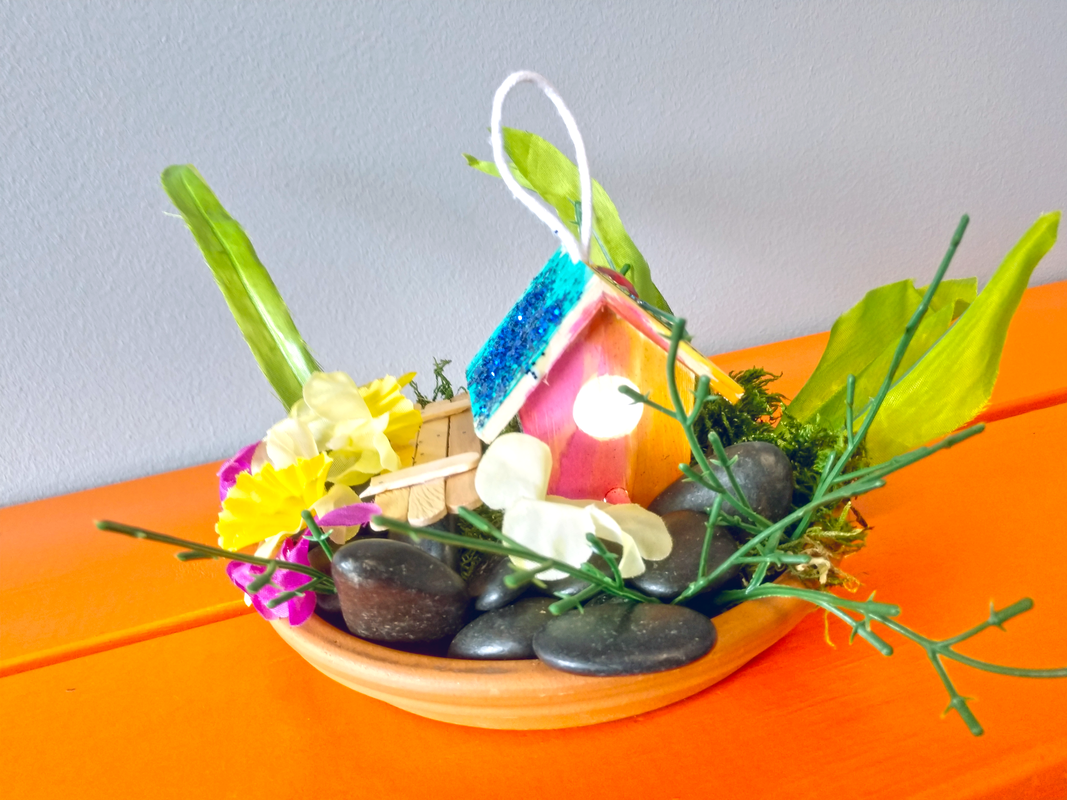 So, there you have it! Our guide to a successful and artful fairy house class, camp, or group project. Of course, you could do this with just one kiddo too, but we love the creative energy of a group. If you get a chance to try it out, send me some pictures or tag me on social media, okay? I'd love to see!  Related posts:
This post contains affiliate links.
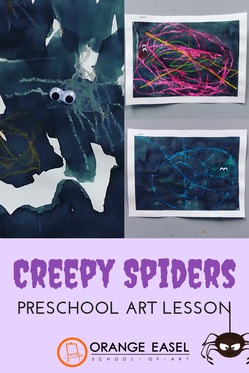
Creepy Crawly Spider WebsPrep paper with blue tape border. Teacher tip: Tape it to the table too! Since we're going to be covering the page with watercolors, this will keep the paper from wrinkling up too much. Talk to your young artists about what spider webs look like. Show some pictures of spider webs--trace the lines with your finger! Hand out the paper and invite artists to make their spider webs with the oil pastels. (After all, what are spider webs except a bunch of lines!?) 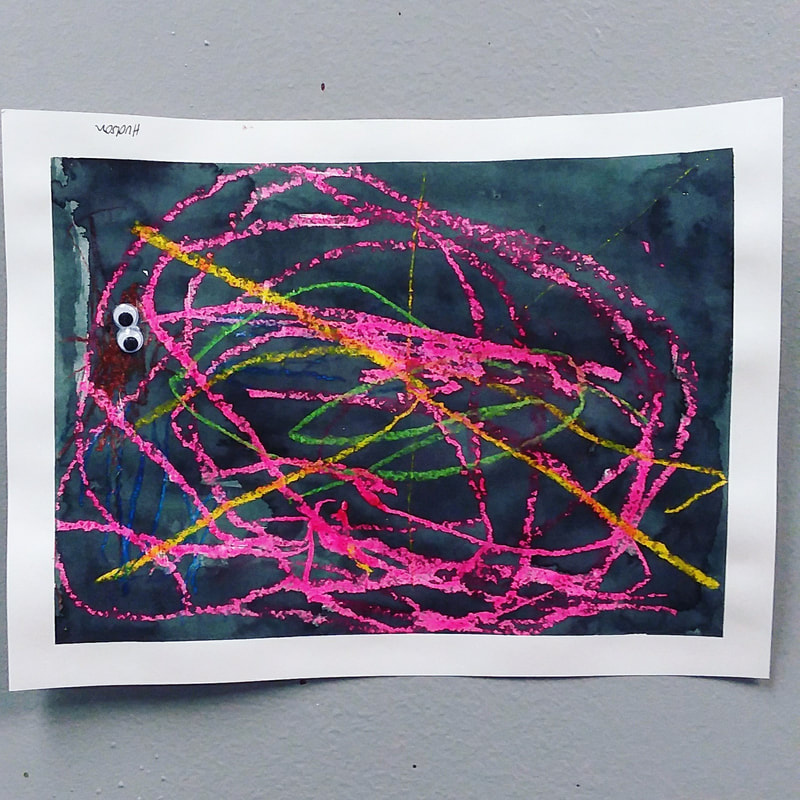 Once we have a good start on our webs, every web needs a spider! Some artists will know immediately how they want to represent the spider. Others will need help breaking it down into steps and shapes. If they need help, ask "what shape do you think our spider's body should be?" "How about the head?". "What do our legs look like?" Teachers, you can demo this drawing step-by-step for your artists: Draw a circle or a dot for the spider body and another circle/dot for the head. Add those spider legs (could be eight...could be more 😉). 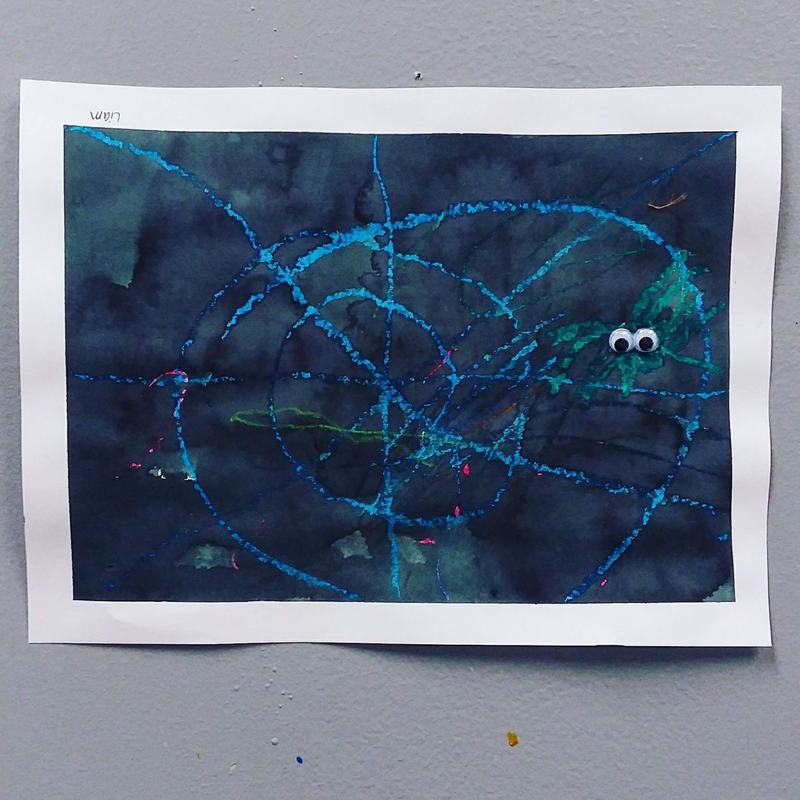 Your artists might begin to add more details to their drawings. Additional spiders. Excessive webbing. Random objects that have nothing to do with Halloween or spiders. Don't stop this. Even if it "ruins" their drawing. Follow their lead. If a racecar or Minecraft character ends up in their spider web, let it go. It's their art, not yours. 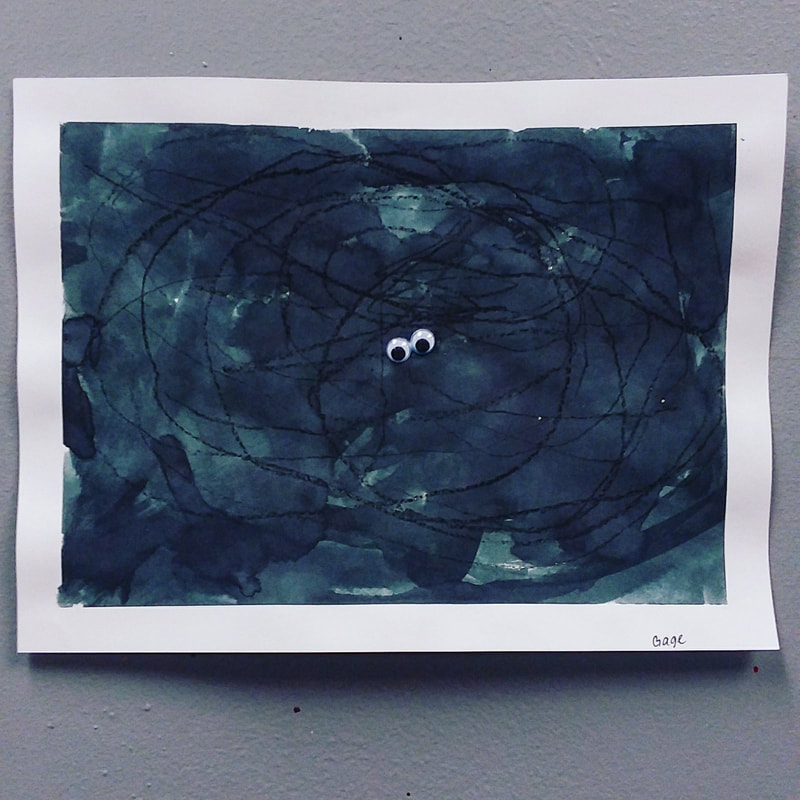 Let's make it look like nighttime. Paint the whole page with black watercolors. Remind your artists to keep the brushes juicy...don't let them dry out! Notice how the really really dark paint doesn't cover our spider web! Oil pastels RESIST the water paints on top. Yeah, science! 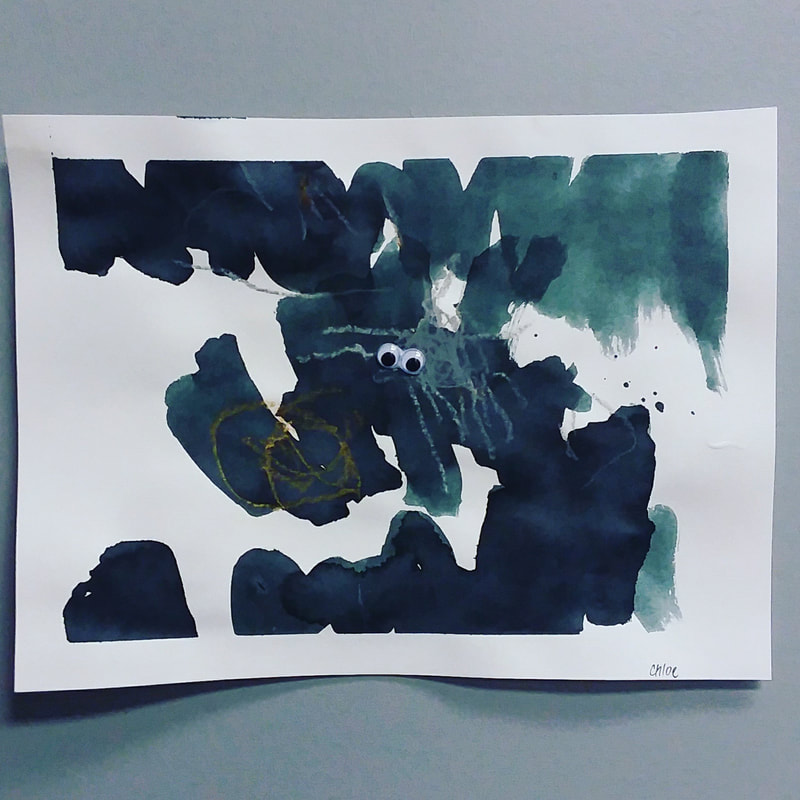 After the paint is dry, add those googly eyes with some glue and then remove the blue tape. Preschool Art doesn't have to be complicated or stressful. A few quality materials and an opening idea, question, or inspiration is all you need. Let the artists do the rest.  |
Orange EaselContent inspired by the artists and art created in our studio. 
Orange Easel began as a small art studio in my basement and continues to grow and serve our community. Read more about our story here.
Archives
April 2024
Categories
All
|


 RSS Feed
QUICK LINKS
|
|
|
|
LIBERTY STUDIO
249 W Mill St Ste 107 Liberty MO 64068 816-407-9266 |
PLATTE WOODS STUDIO
7617 NW Prairie View Rd Kansas City MO 64157 816-216-7126 |
|
Copyright © 2023 Orange Easel. All rights reserved.
Privacy Policy |
|