
|
All of our March classes have been exploring PRINTMAKING. Our preschoolers have had MANY opportunities to explore this concept through relief prints, stamping, and mono prints. Check out some of our favorites:
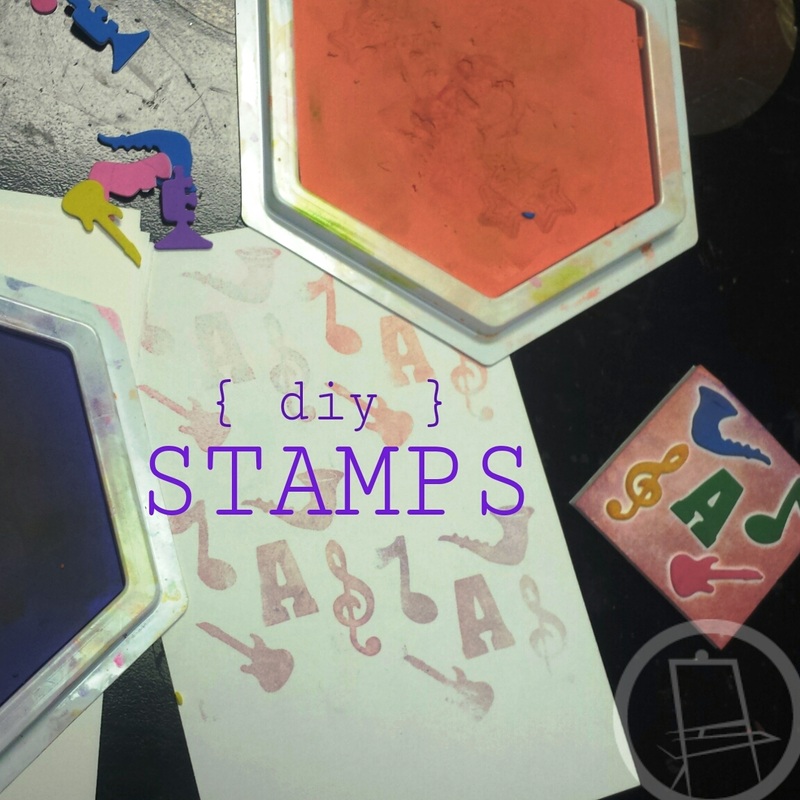
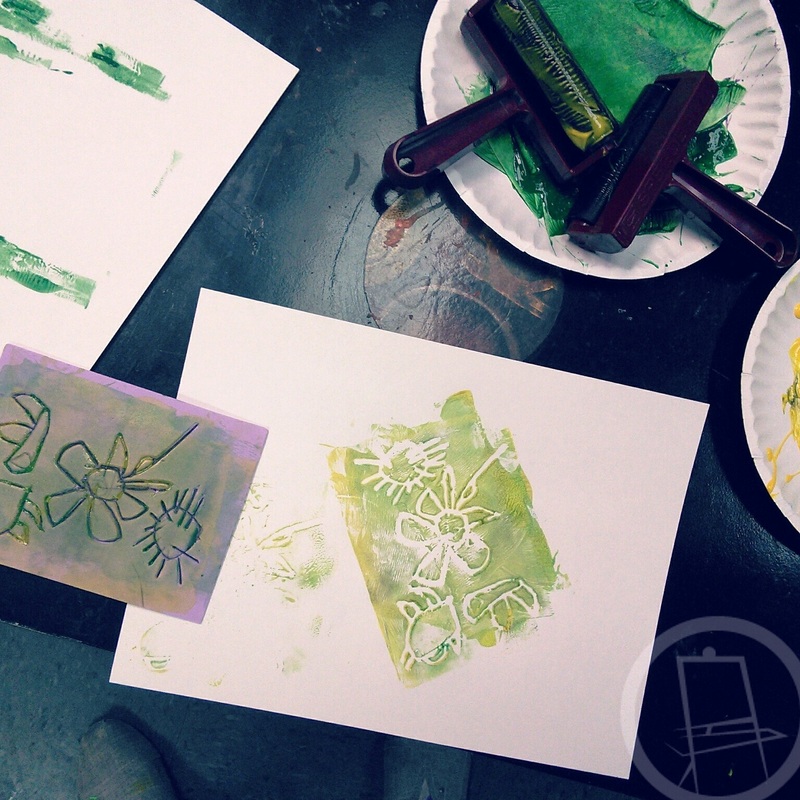
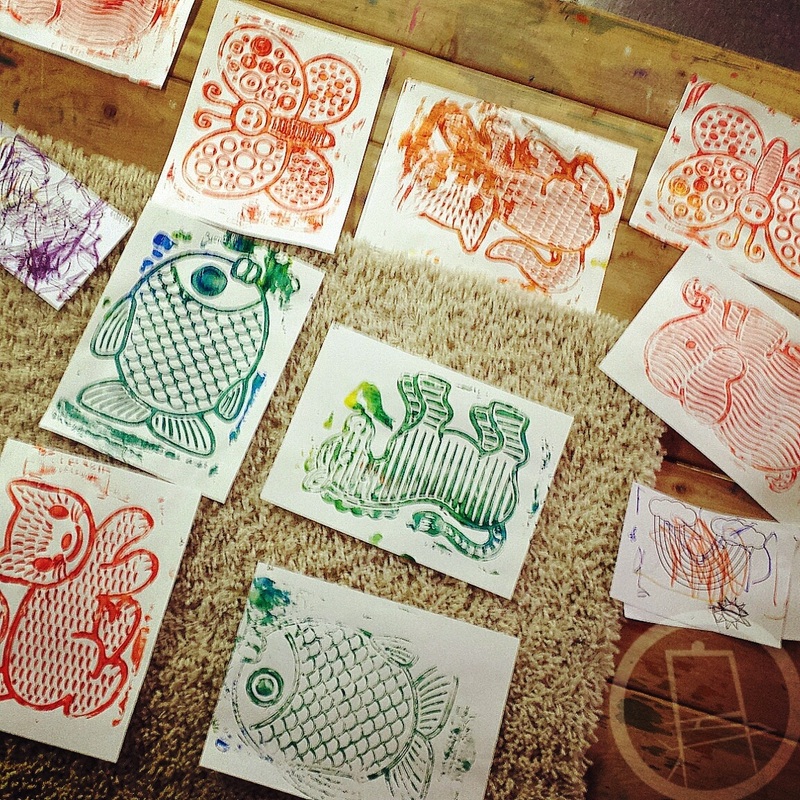
TOP TO BOTTOM, LEFT tO RIGHT:1. DIY STAMPS Pick up some inexpensive foam stickers to make your own stamps! We used foam board but into small 3x3 squares for our backing but cardboard would work too. Be careful with the alphabet foam letters--they are tricky! You have to remember to put them on backwards because they PRINT in reverse! 2. FAUX FLOWER PRINTS Faux flowers make interesting prints if you dip them in a thin layer of paint. They almost look like fireworks! I think we'll try this one again with neon and glitter paint around the 4th of July! 3. CARVING FOAM Use a dull pencil to draw a picture on a piece of craft foam. Push down to "dent" the foam on your pencil line. For our younger preschoolers, we had them draw FIRST (you can even use a marker if it's easier) and then the teacher pushed the lines down. Roll a thin layer of paint over the top and then make as many relief prints as you'd like. These make wonderful notecards! 4. RUBBING PLATES If you have some textured rubbing plates layer around (the ones that are designed to be used with crayons), they make great printmaking plates too! Just a thin layer of paint and a whole bunch of paper! NOTE: Our young artists especially enjoyed working with the brayers this month. If you are looking for a new art tool to invest in, we highly recommend getting one. We'll be using ours again next month outside of printmaking--just as a painting tool!
0 Comments
Your comment will be posted after it is approved.
Leave a Reply. |
Orange EaselContent inspired by the artists and art created in our studio. 
Orange Easel began as a small art studio in my basement and continues to grow and serve our community. Read more about our story here.
Archives
April 2024
Categories
All
|

 RSS Feed
QUICK LINKS
|
|
|
|
LIBERTY STUDIO
249 W Mill St Ste 107 Liberty MO 64068 816-407-9266 |
PLATTE WOODS STUDIO
7617 NW Prairie View Rd Kansas City MO 64157 816-216-7126 |
|
Copyright © 2023 Orange Easel. All rights reserved.
Privacy Policy |
|